
In a nutshell
- Enable Bloom in your theme
- Style the pre-order button and messaging
- Set oversell limits and ship dates per variant
- Show pre-order info during and after checkout
Before you begin
- Shopify 2.0 Theme (some 1.0 themes are also compatible)
- Admin access to edit your theme
Walk-through
Follow the in-app setup guide
The Bloom home page (Apps → Bloom) has a setup guide for each feature. Pick Pre-order to see each step, with a button that deep-links to the right screen.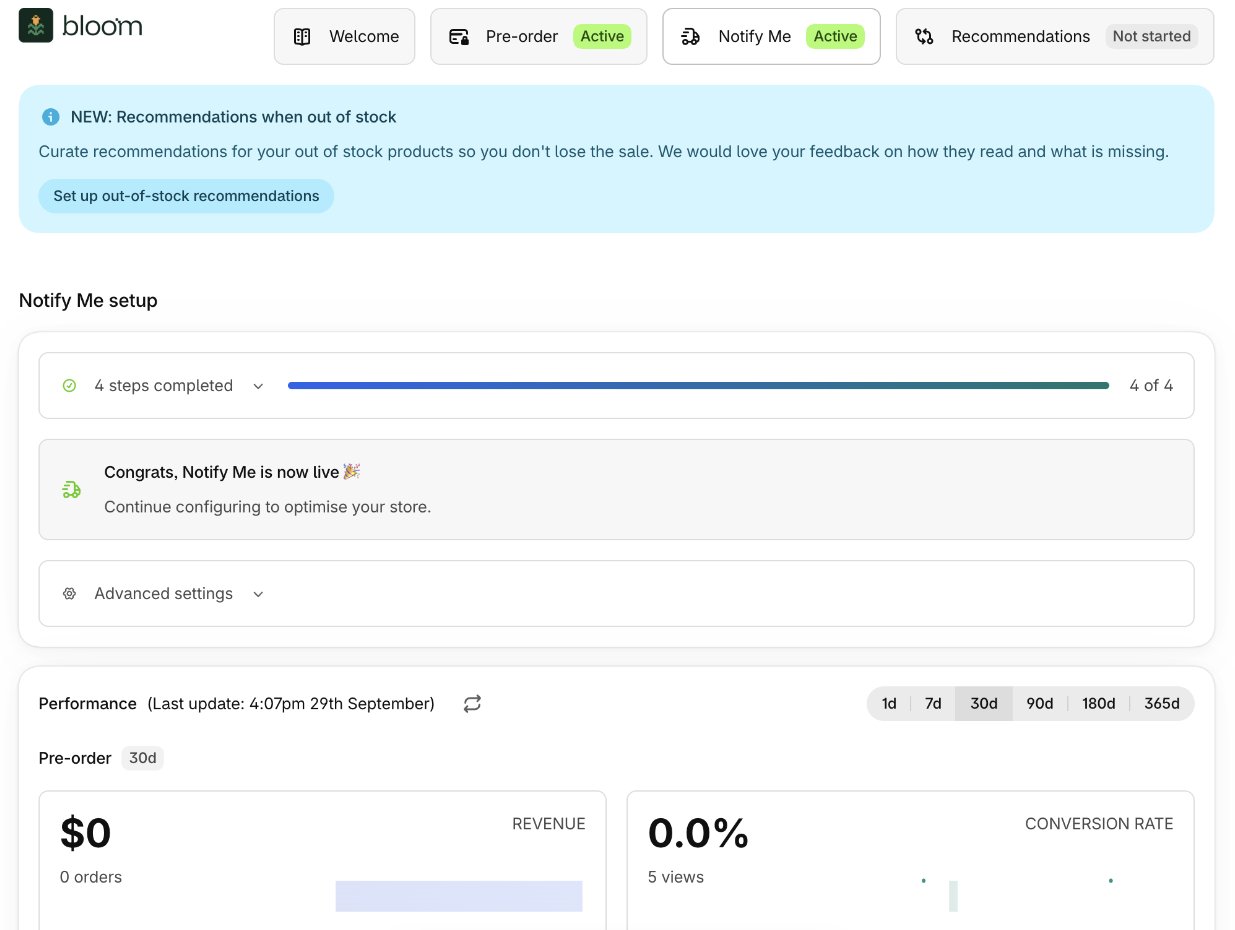
1. Enable Bloom in your theme
Enabling the Bloom app embed is the only theme change required. The pre-order message auto-injects next to your Add to cart button on every product page.- From Shopify admin, go to Online Store → Themes.
- On your live theme click Customise.
- Open the App embeds panel (the puzzle-piece icon in the left sidebar).
- Toggle Bloom on.
- Click Save.
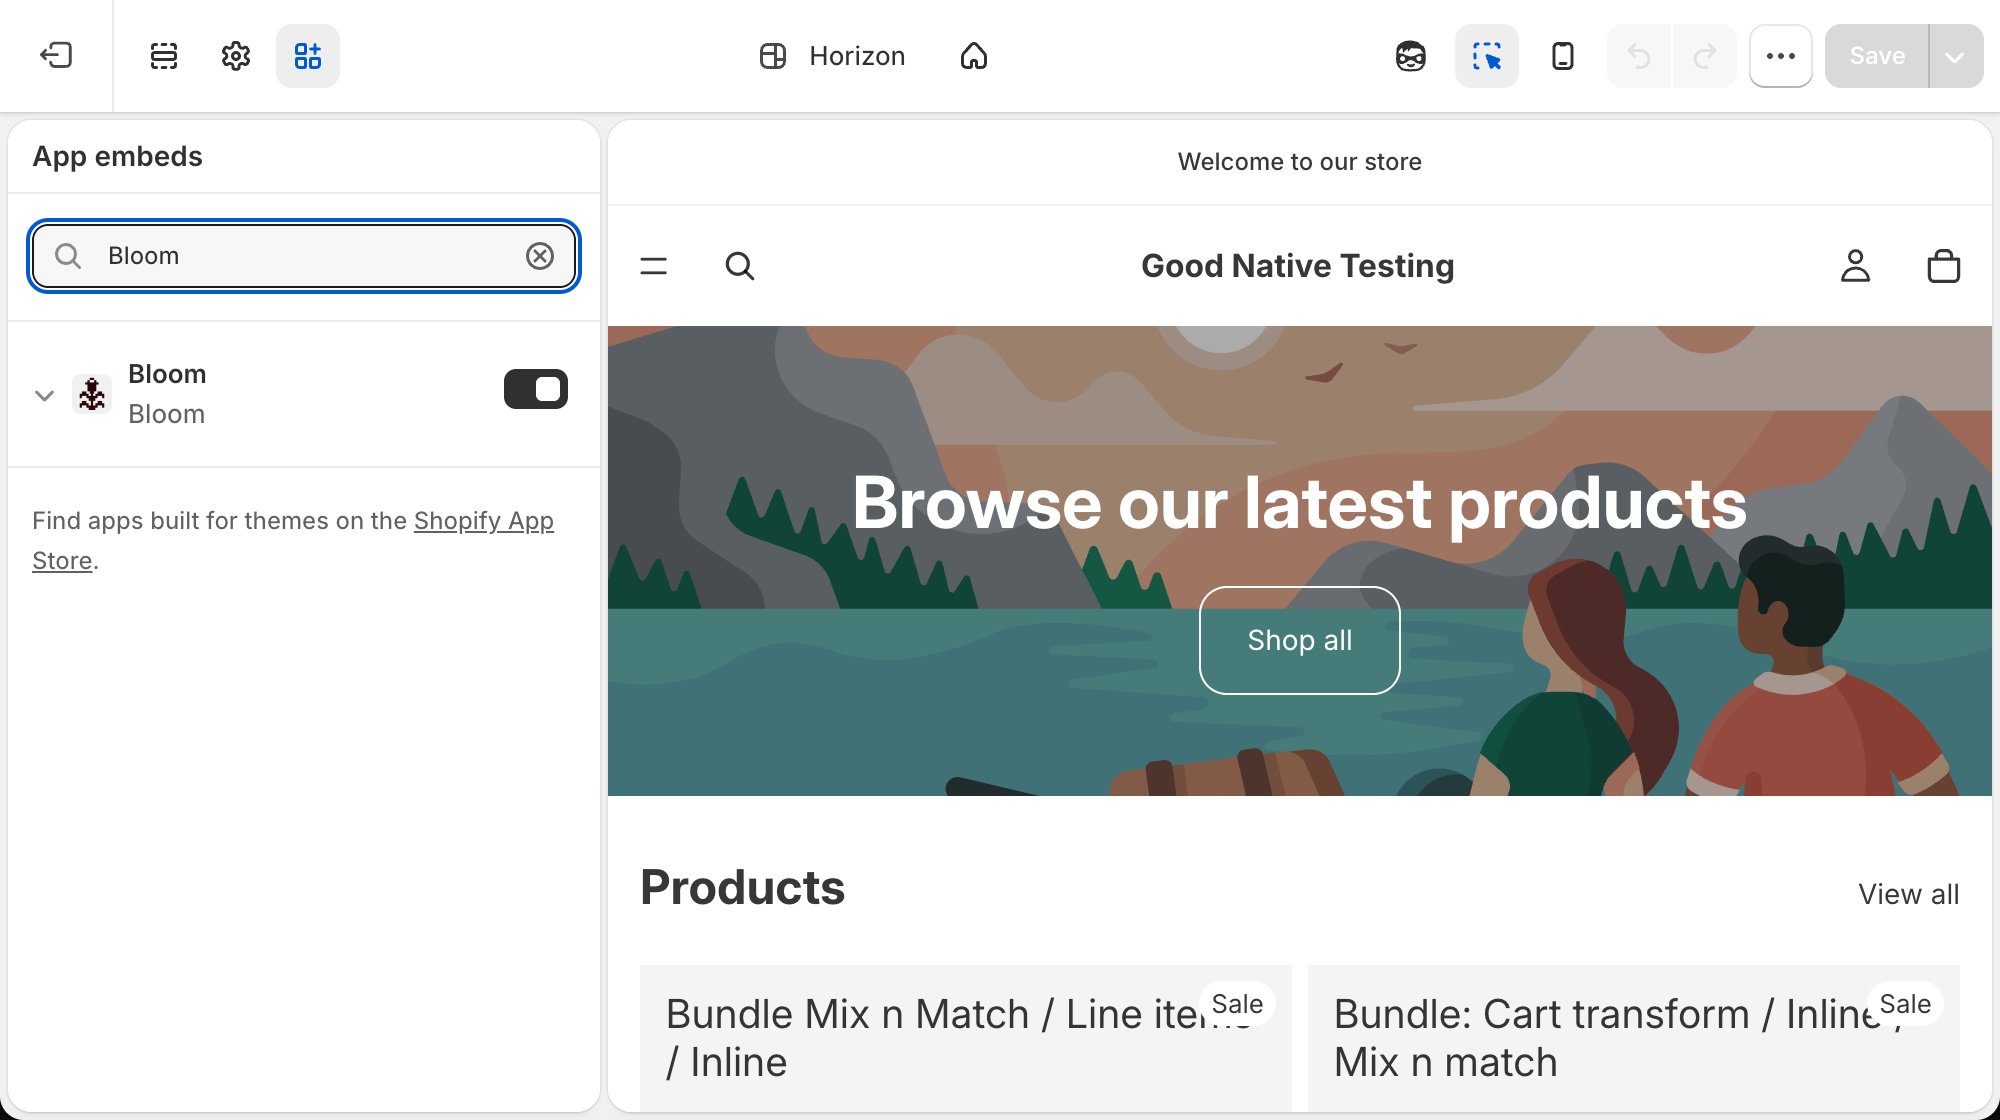
We recommend disabling instant checkout (Shop Pay, Google Pay, and other dynamic checkout buttons on the product page) for pre-order products. Instant checkout skips the cart, so shoppers miss the pre-order line item message and cart messaging that explains what they’re agreeing to.
Product page block
Most themes need nothing more than the app embed. Add the Bloom Product block to your product template only if:- The pre-order button flickers or doesn’t appear on your theme.
- You want per-template, market or locale overrides.
2. Design & messaging
- In Shopify admin, open Apps → Bloom.
- Go to Pre-order → Design.
- Work through the groups in the left column - Message, Button, Variant picker and Quantity limits for the product page, plus the cart messages - adjusting colours, borders and spacing.
- Check your work in the Preview panel. Switch it between Product page and Cart, and between states such as Pre-Order and Sold-Out Notify.
- Click Save.
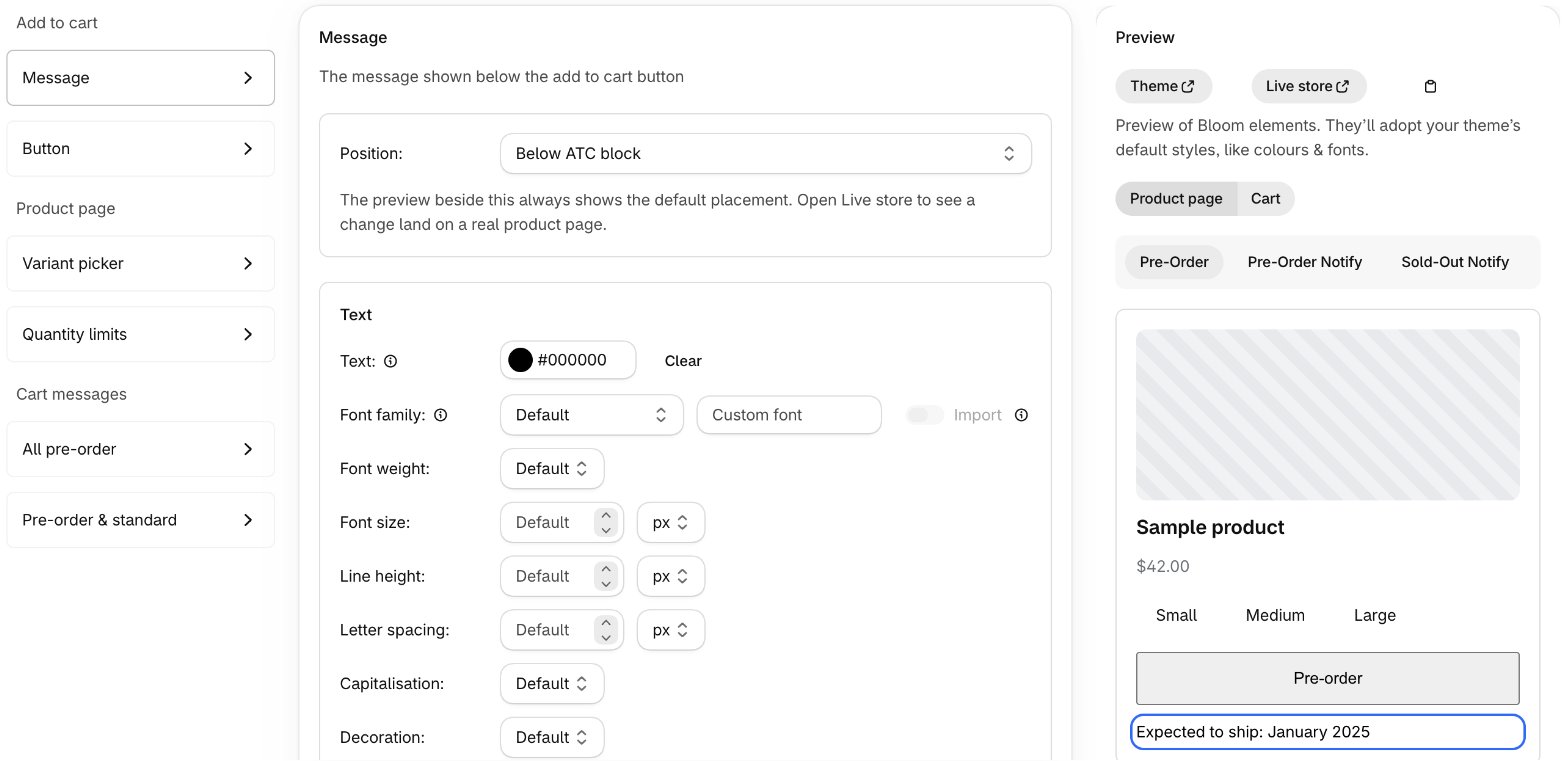
The pre-order message sits below Add to cart by default. Move it with Position at the top of the Message group - see Message placement.
Tailor messaging on specific templates, locales or markets with the Bloom blocks in your theme customiser. See Tailor template, market or locale.
3. Configure products
Pre-order shows when a variant has pre-order enabled, has an oversell limit greater than zero, and is out of stock.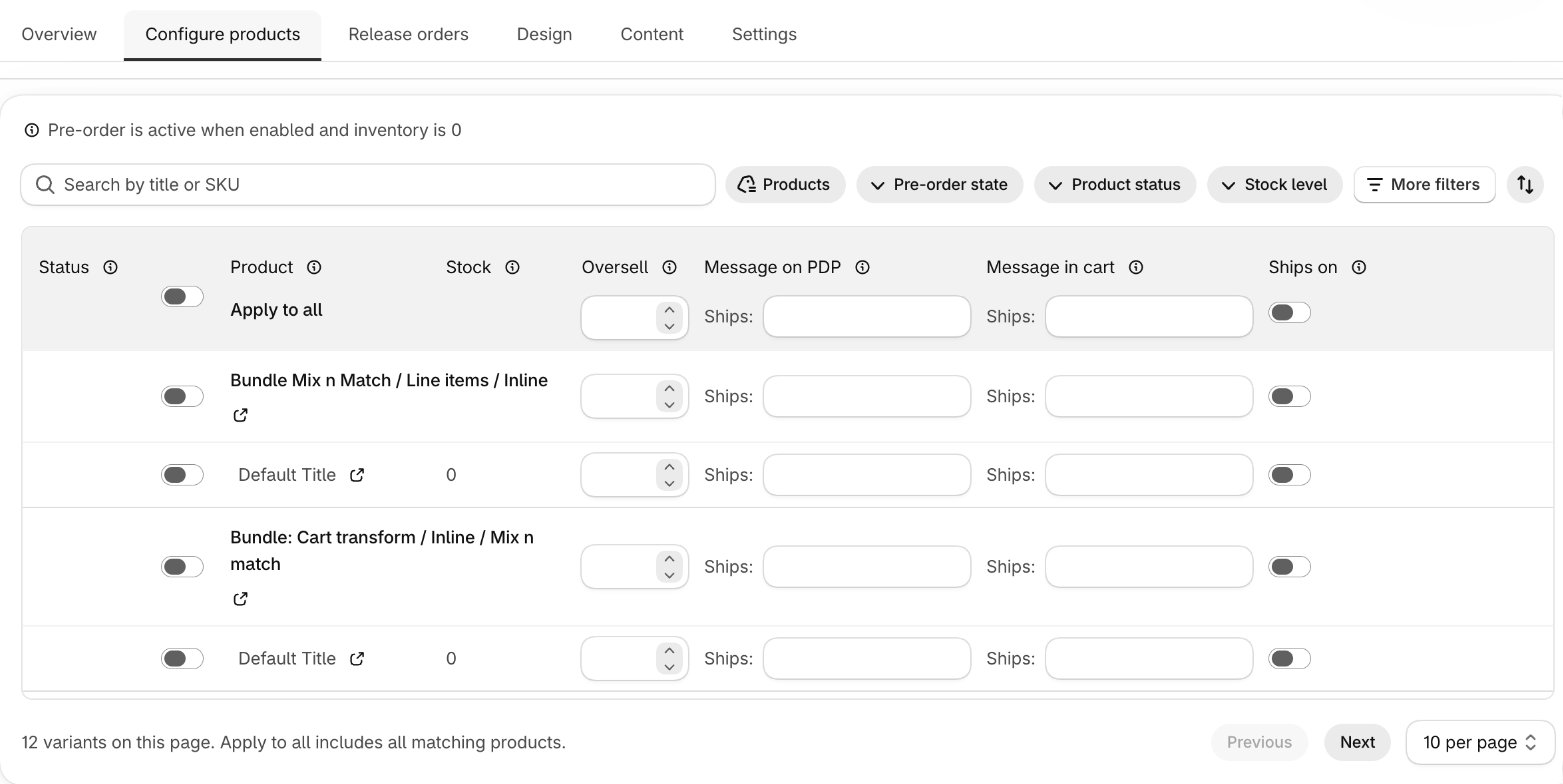
- In Shopify admin, open Apps → Bloom.
- Go to Pre-order → Configure products.
- Find the variants you want with the search and filter bar - filter by collection, vendor, tag or product type, or set Stock level to Sold out for everything currently at zero.
- Edit the Apply to all row to set every listed variant at once, or edit a single product or variant row.
- Set oversell limits, messaging, ship dates, and when pre-order should start.
- Click Save.
The Release orders tab alongside Configure products is where you release pre-orders once stock lands. See Releasing pre-orders.
4. Show pre-order info during and after checkout
Bloom ships three customer-facing blocks beyond the product page:
Where the copy comes from:
- Banner text on Checkout and Thank you: Apps → Bloom → Pre-order → Content → Cart messages → Cart notices - the all pre-order and mixed cart messages, plus Checkout banner style.
- Per-line text on Order status: each variant’s Message in cart.
Add blocks to checkout, thankyou & order status
- Open the relevant editor in Shopify admin (the setup guide’s Checkout, Thank you and Order status buttons link straight there):
- Checkout and Thank you: Settings → Checkout → Customize (Shopify Plus).
- Order status: Settings → Customer accounts → Customize.
- Switch to the page, click Add app block, pick the Bloom block.
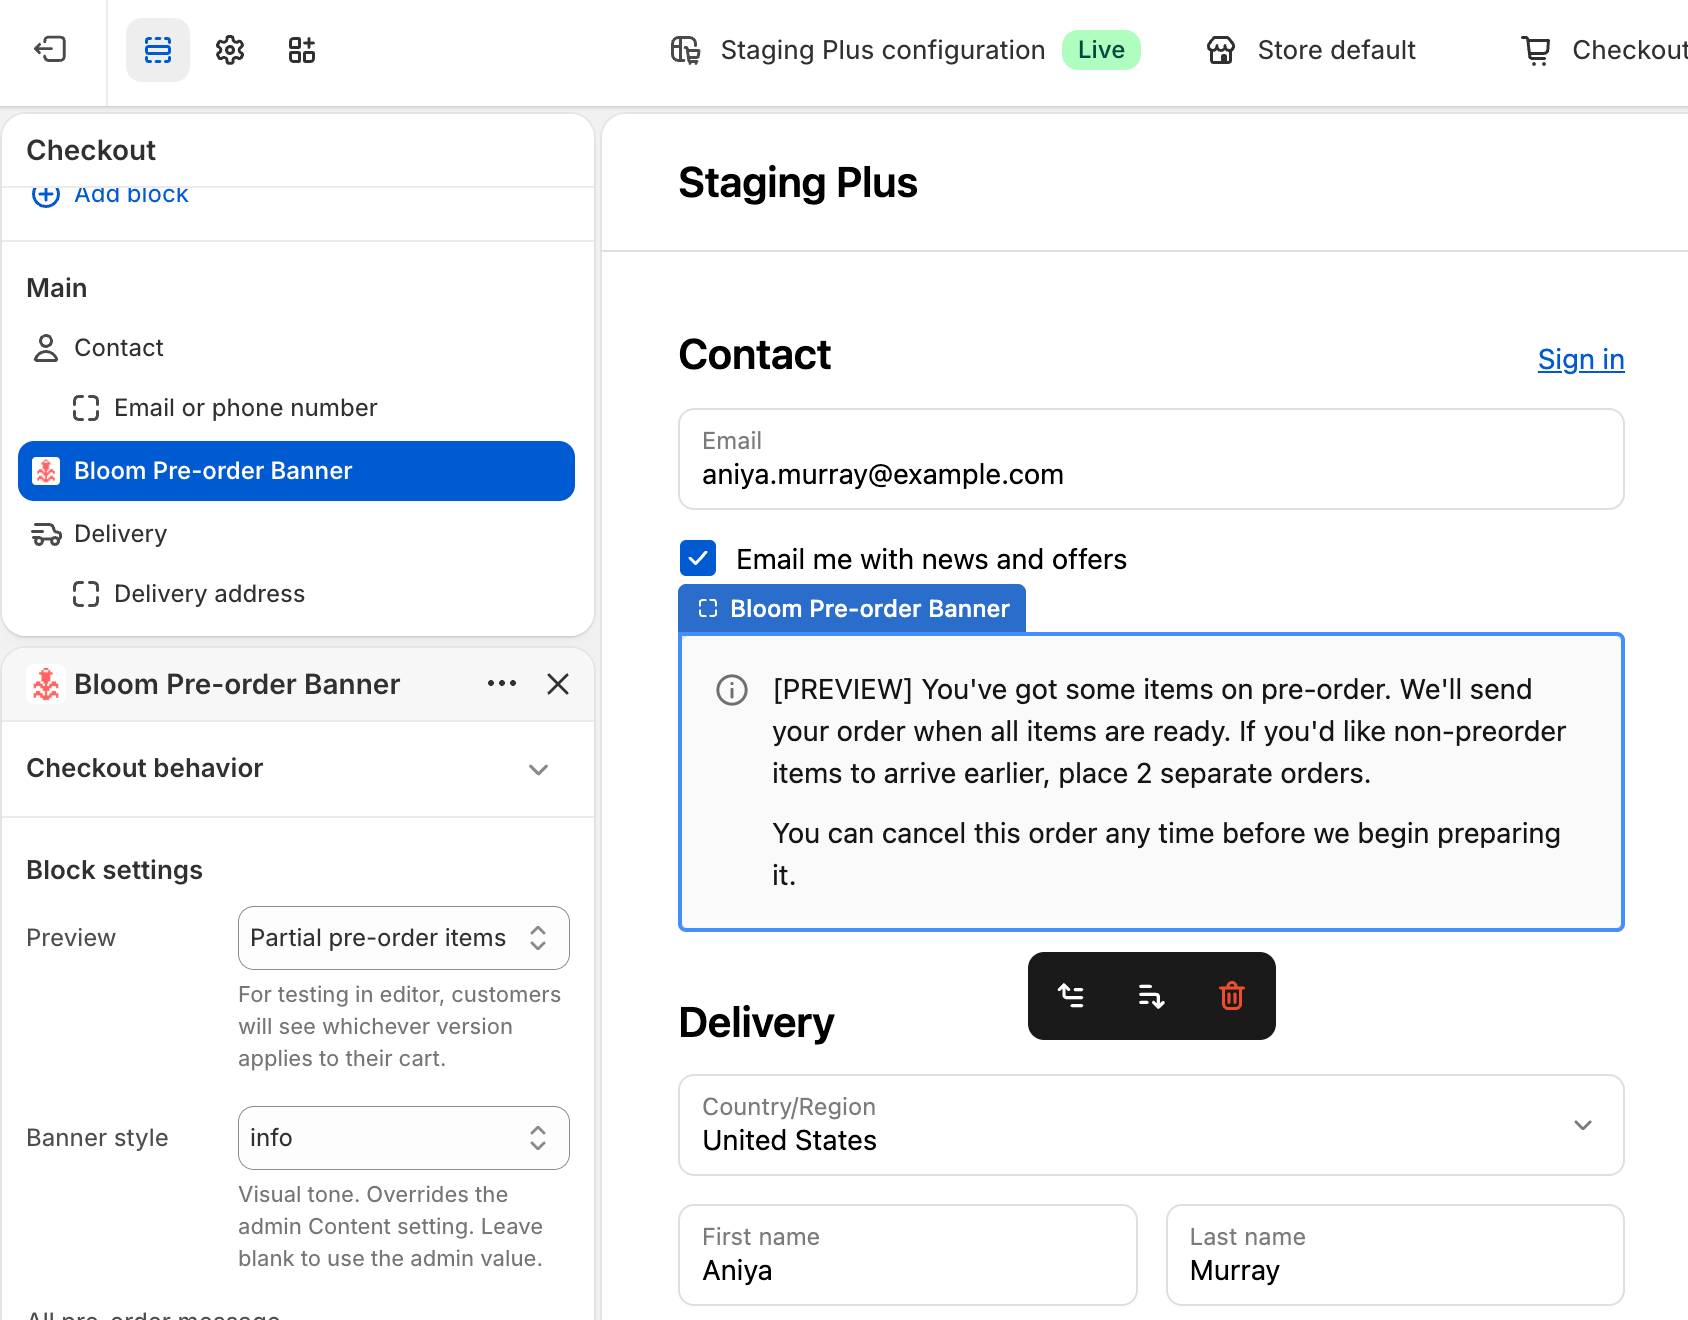
- Click Save.
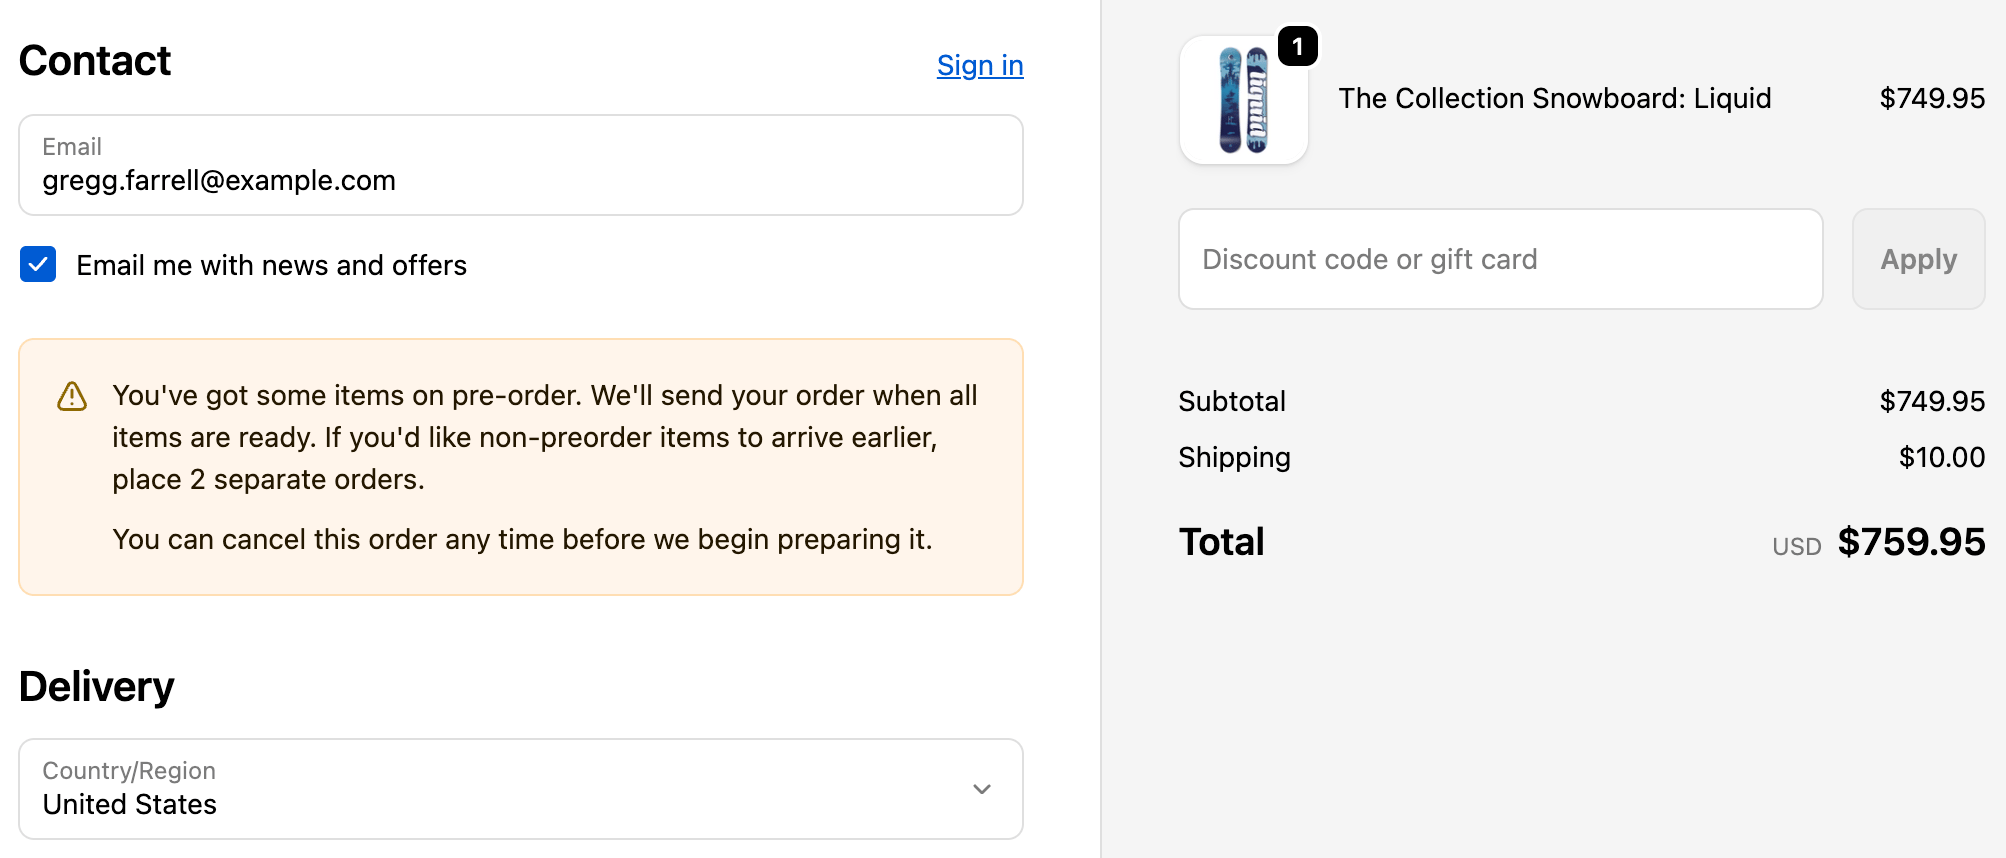
Bloom does not display on gift card products.