
In a nutshell
- Enable Bloom in your theme
- Style the Notify Me form and messaging
- Connect Klaviyo
- Set up the back-in-stock flow in Klaviyo
Before you begin
- Shopify 2.0 Theme (some 1.0 themes are also compatible)
- Admin access to edit your theme
- A Klaviyo account
Walk-through
Follow the in-app setup guide
Bloom opens on Home (Apps → Bloom). Pick the Notify Me tile to see its setup steps, each with a button that deep-links to the right screen. The tile flips to Active once every step is done.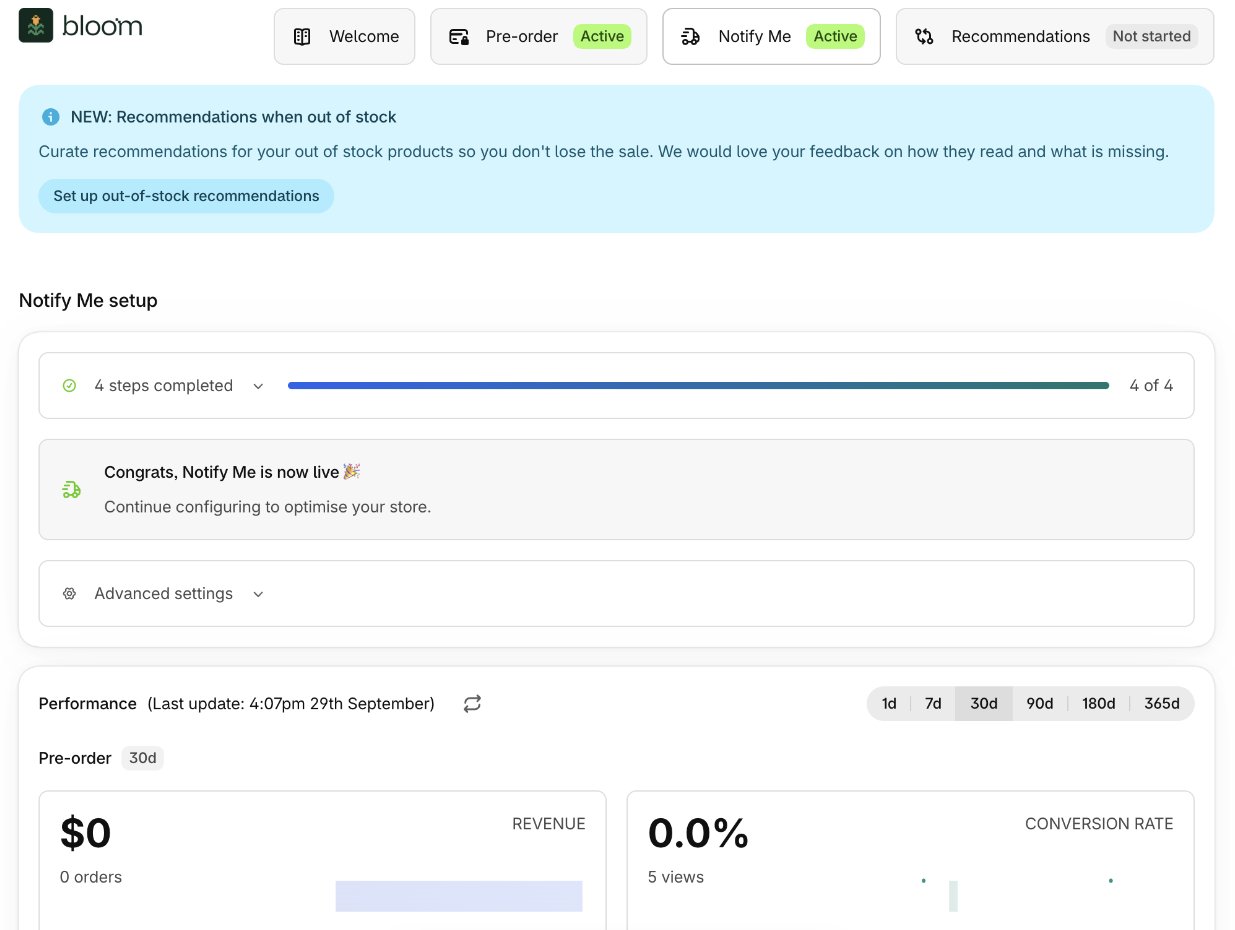
1. Enable Bloom in your theme
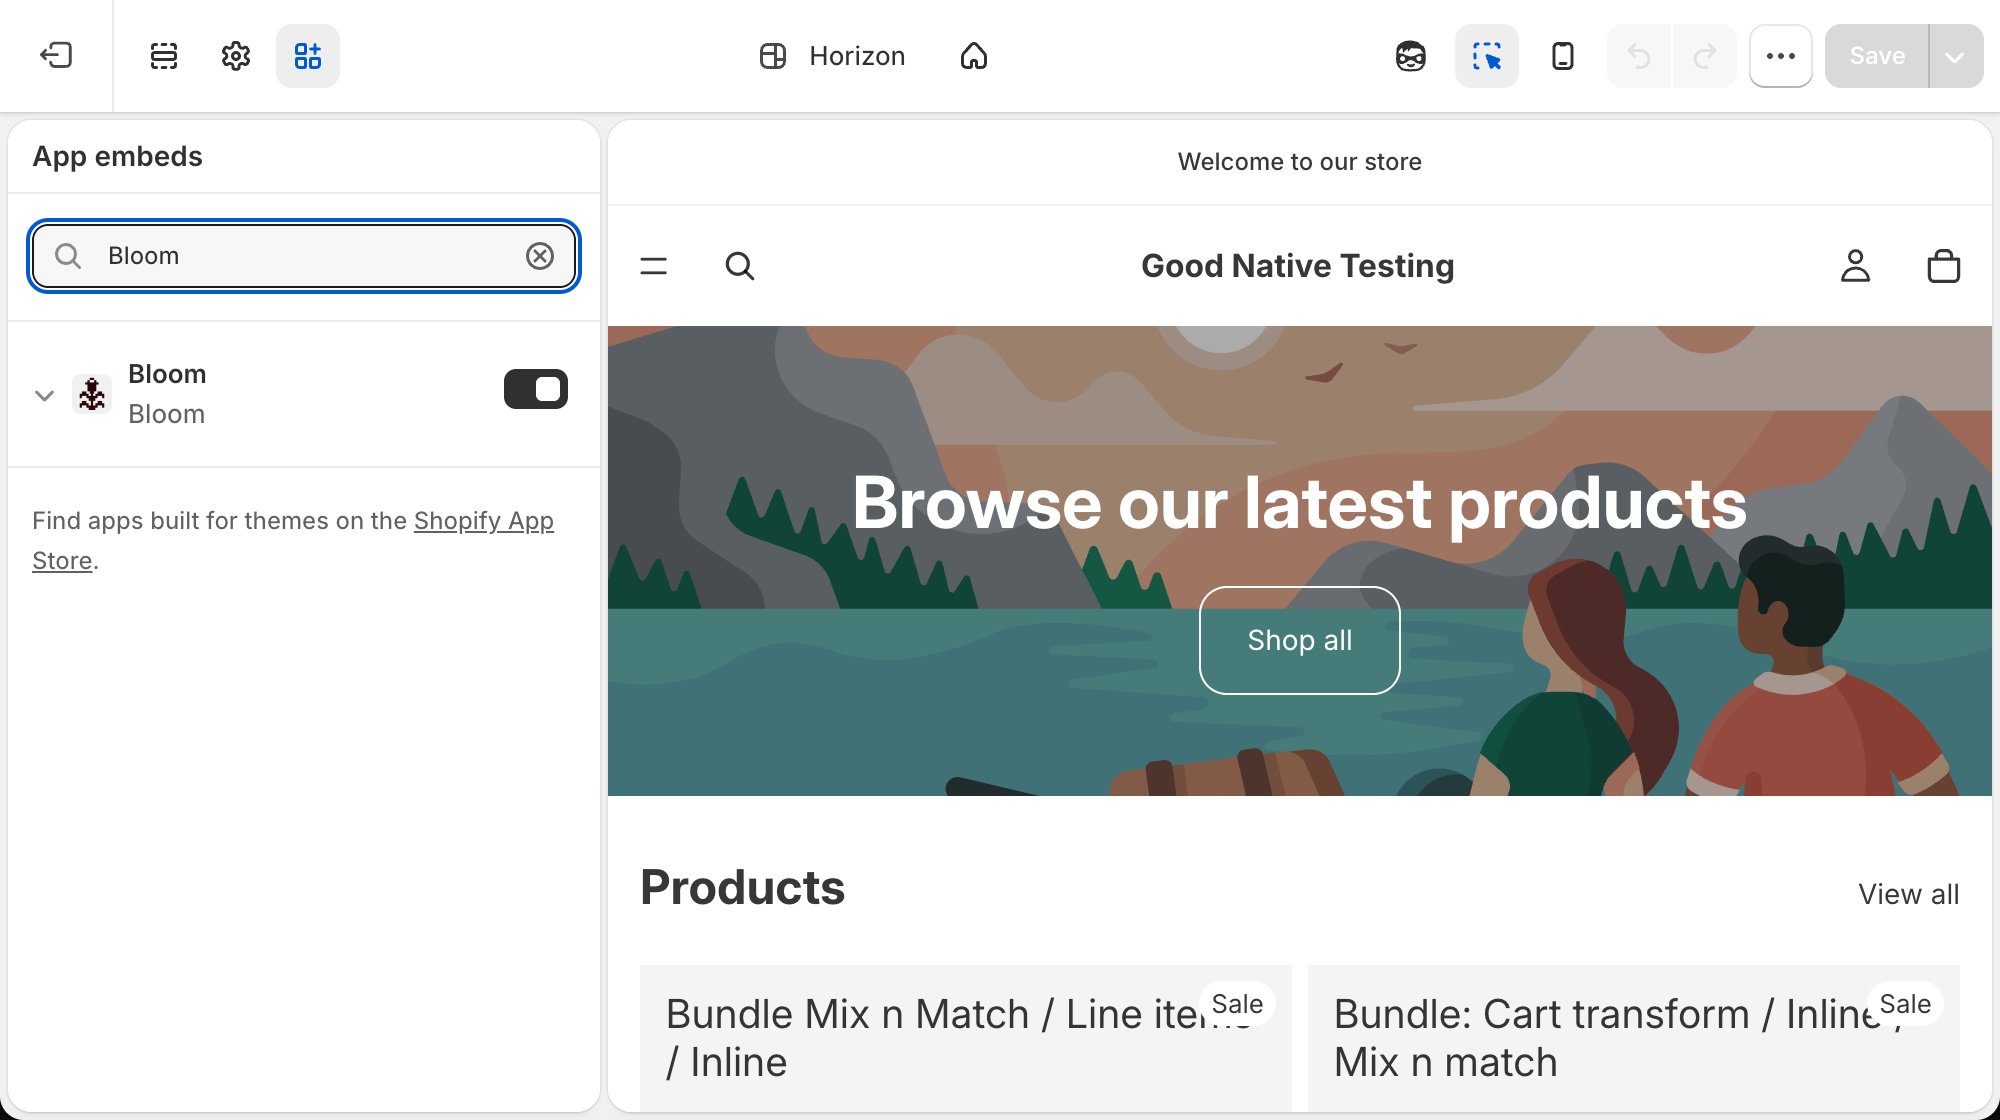
Enabling the Bloom app embed is the only theme change required. The Notify Me form auto-injects next to your Add to cart button on every product page.- From Shopify admin, go to Online Store → Themes.
- On your live theme click Customise.
- Open the App embeds panel (the puzzle-piece icon in the left sidebar).
- Toggle Bloom on.
- Click Save.
Product page block
Most themes need nothing more than the app embed. Add the Bloom Product block to your product template only if:- The Notify Me form flickers or doesn’t appear on your theme.
- You want per-template, market or locale overrides.
2. Design & messaging
- In Shopify admin, open Apps → Bloom.
- Go to Notify me → Design.
- Work through the groups in the left column, adjusting text, buttons, colours, borders and spacing.
- Check your work in the preview. Live store opens the same editor on your storefront.
- Click Save.
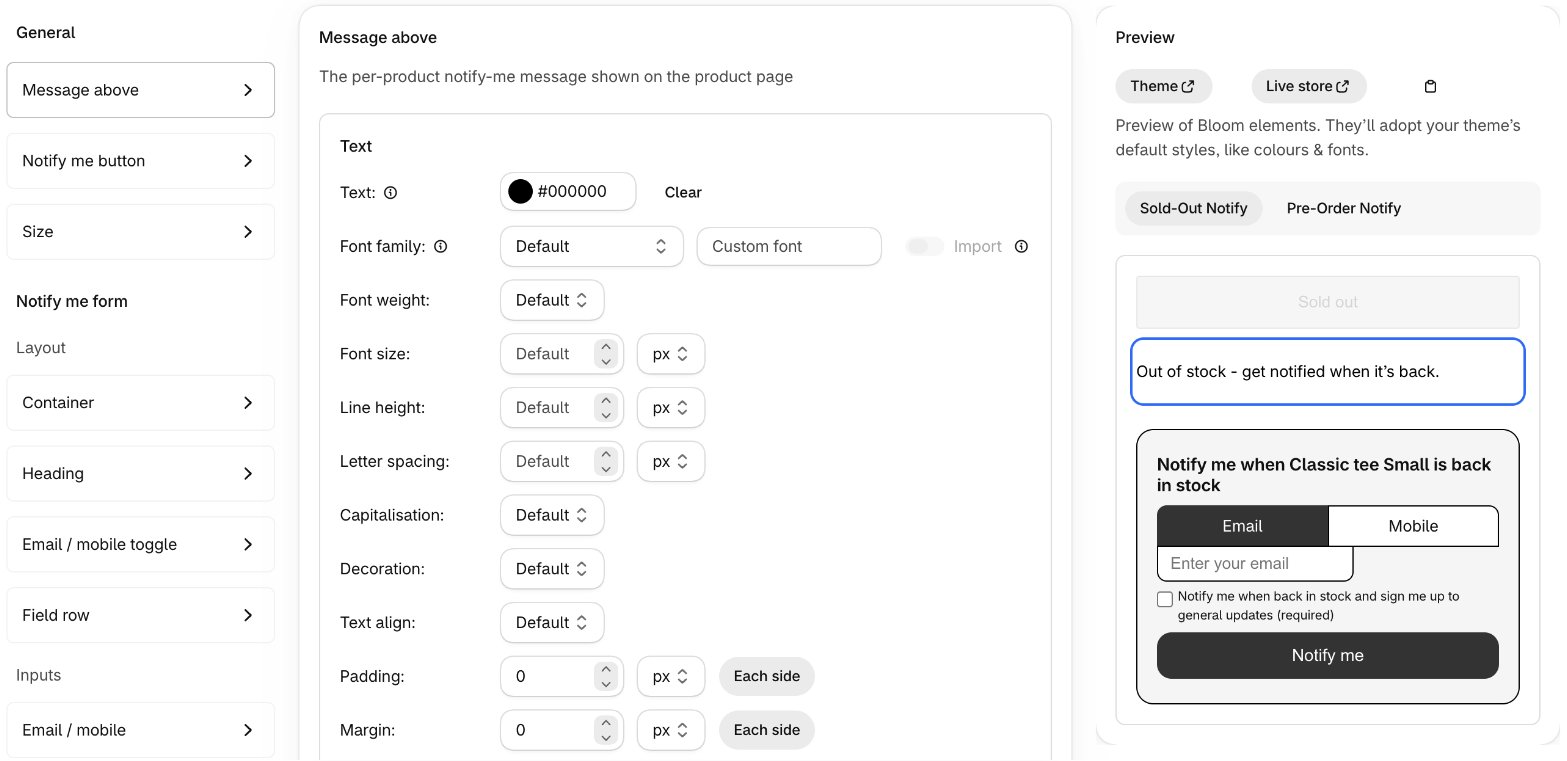
Sold-out variants show the form open, with no button. Change the message position and contact methods in Notify Me settings.
{product-name} and {variant-name} tokens. On desktop, the preview beside the fields updates as you type.
Tailor messaging on specific templates, locales or markets with the Bloom blocks in your theme customiser. See Tailor template, market or locale.
3. Connect Klaviyo
All email and SMS communications come from Klaviyo using their back-in-stock flows.- In Shopify admin, open Apps → Bloom.
- Go to Notify me → Settings, then Integrations → Klaviyo integration.
- Click Connect Klaviyo and authorise Bloom. The panel shows Connected with the granted scopes.
- Pick your Back-in-stock list, or use Create a list to make one. Leave it on Klaviyo account default to subscribe shoppers without adding them to a list.
- Click Save.
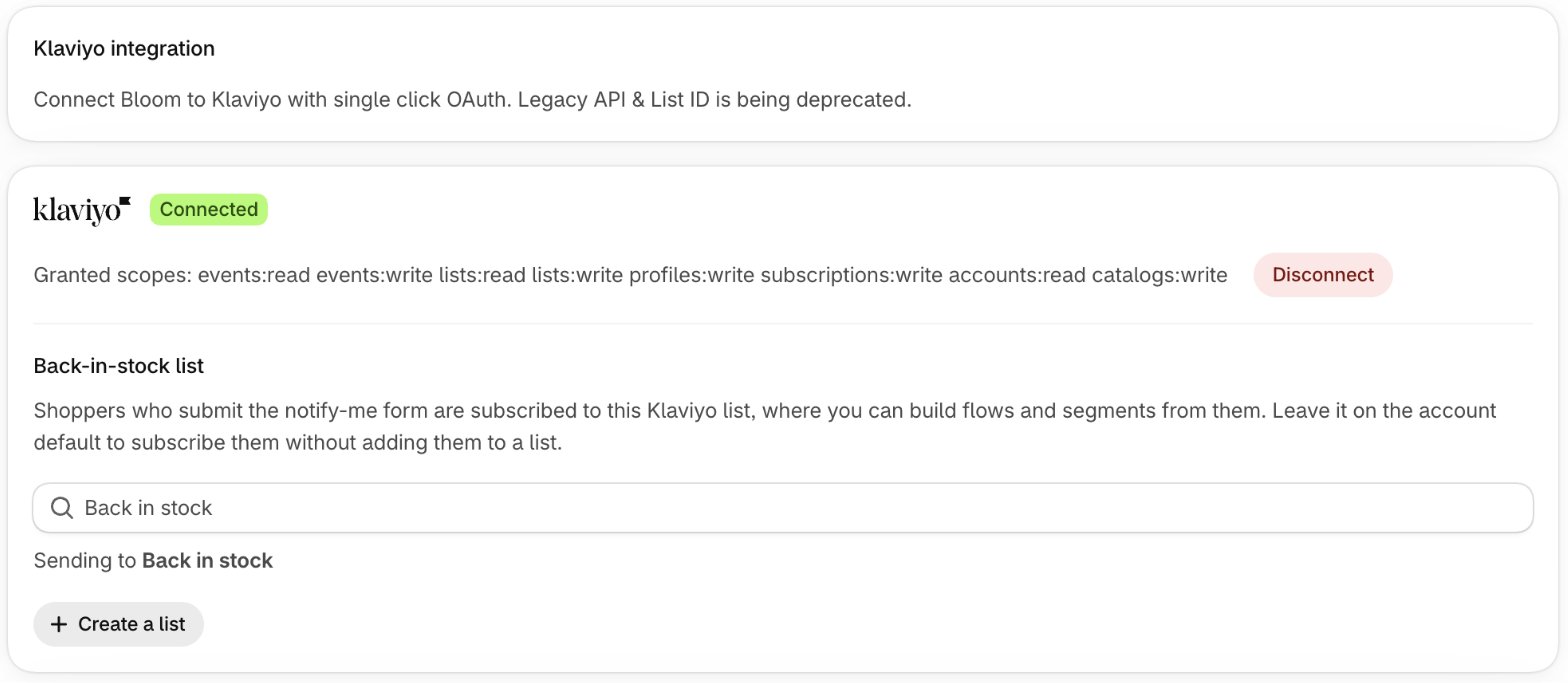
You will start receiving Notify Me sign-ups at this point.
4. Set up the back-in-stock flow in Klaviyo
Sign-ups are captured immediately, but no email or SMS goes out until this flow is live in Klaviyo. Full walk-through: Set up the back-in-stock flow.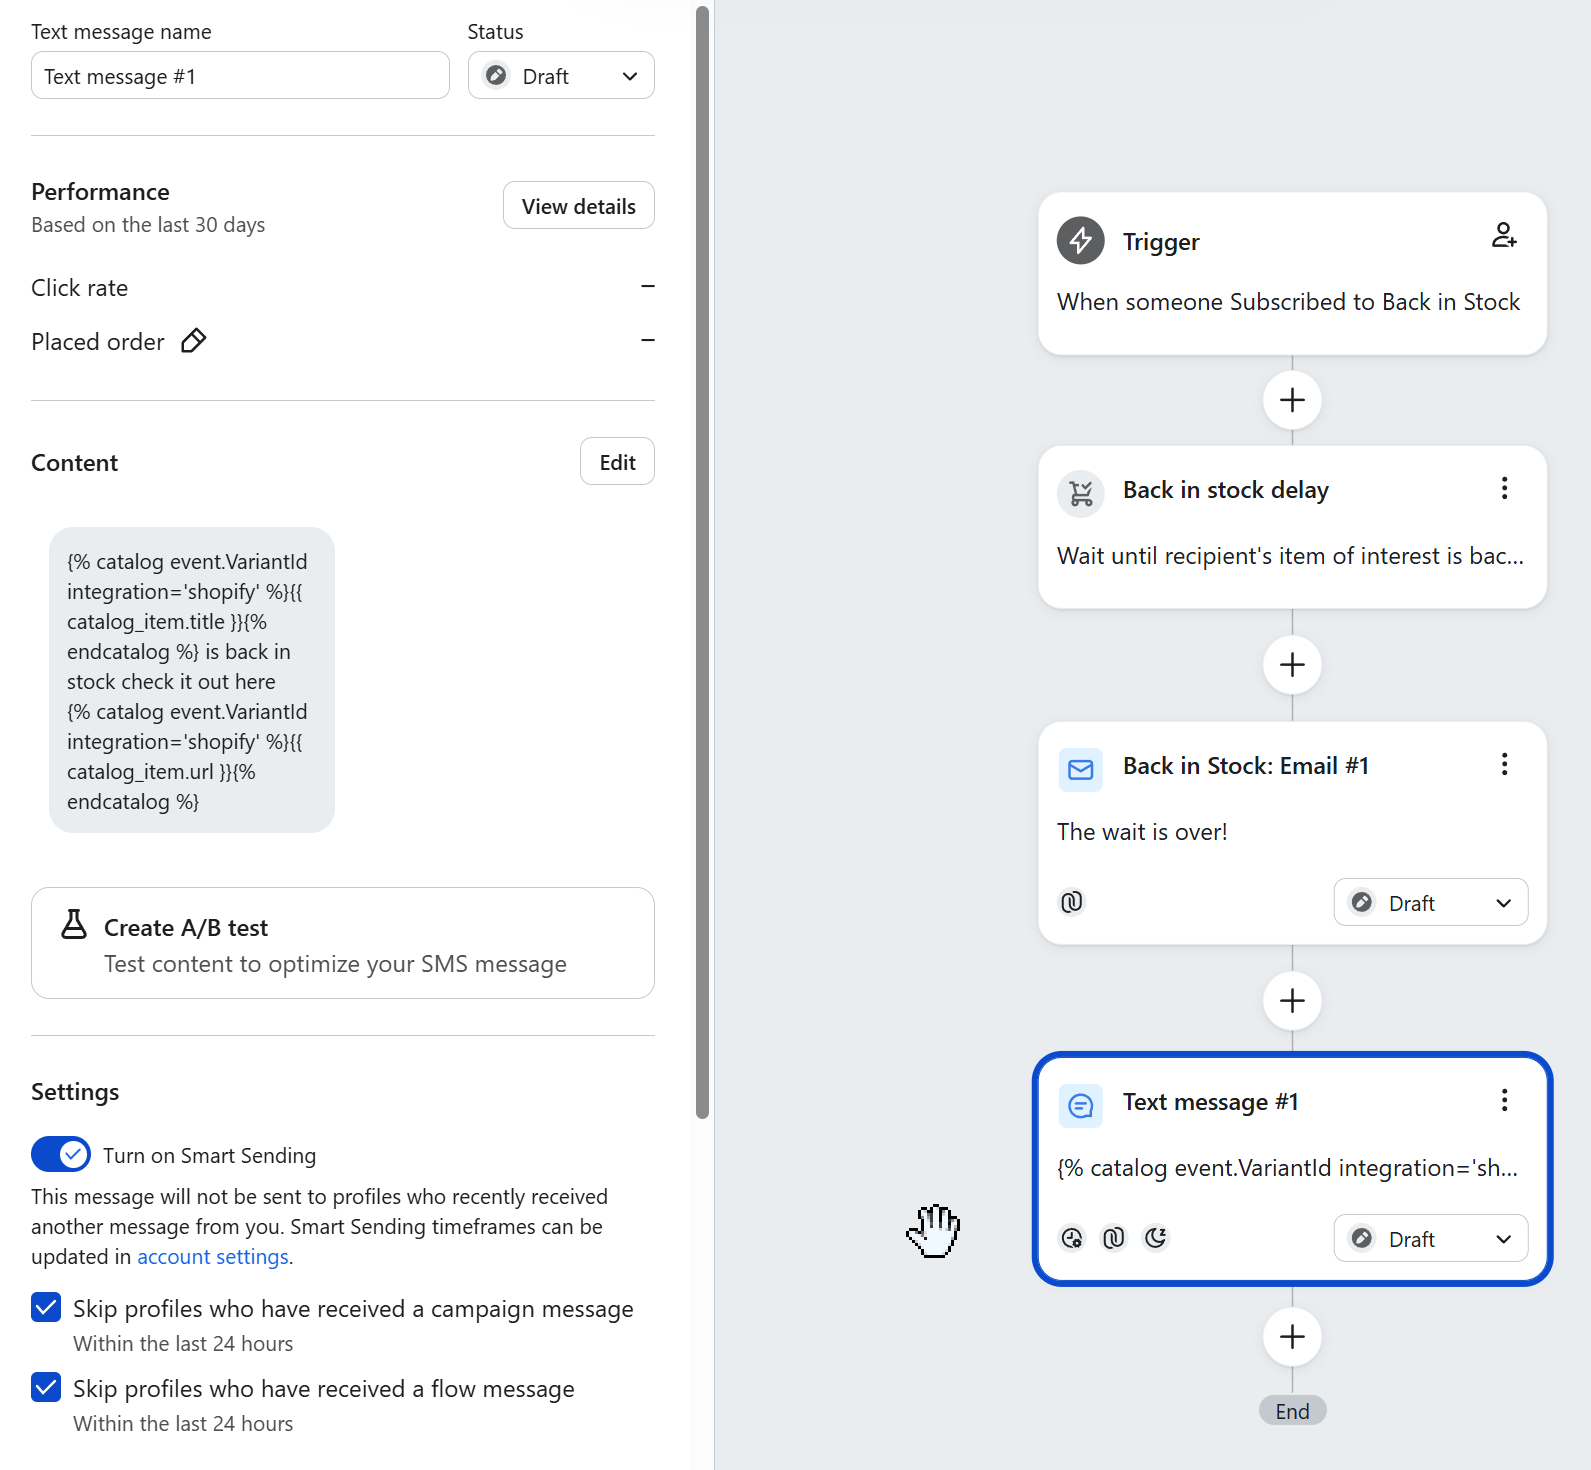
Optional
- Customise each product - button label, form heading
- Disable Notify Me on products you don’t want offering sign-ups
- Add a campaign - custom copy and a question at sign-up
- Adjust tracking events
Bloom does not display on gift card products.