
Walk-through
In a nutshell
- Enable Bloom in your theme
- Style and customise messaging
- Pre-order Configure products you want on pre-order
- Notify Me Connect Klaviyo and set up the back-in-stock flow
 Pre-order
 Notify Me
Before you begin
- Shopify 2.0 Theme (some 1.0 themes are also compatible)
- Admin access to edit your theme
- Notify Me: A Klaviyo account
Follow the in-app setup guide
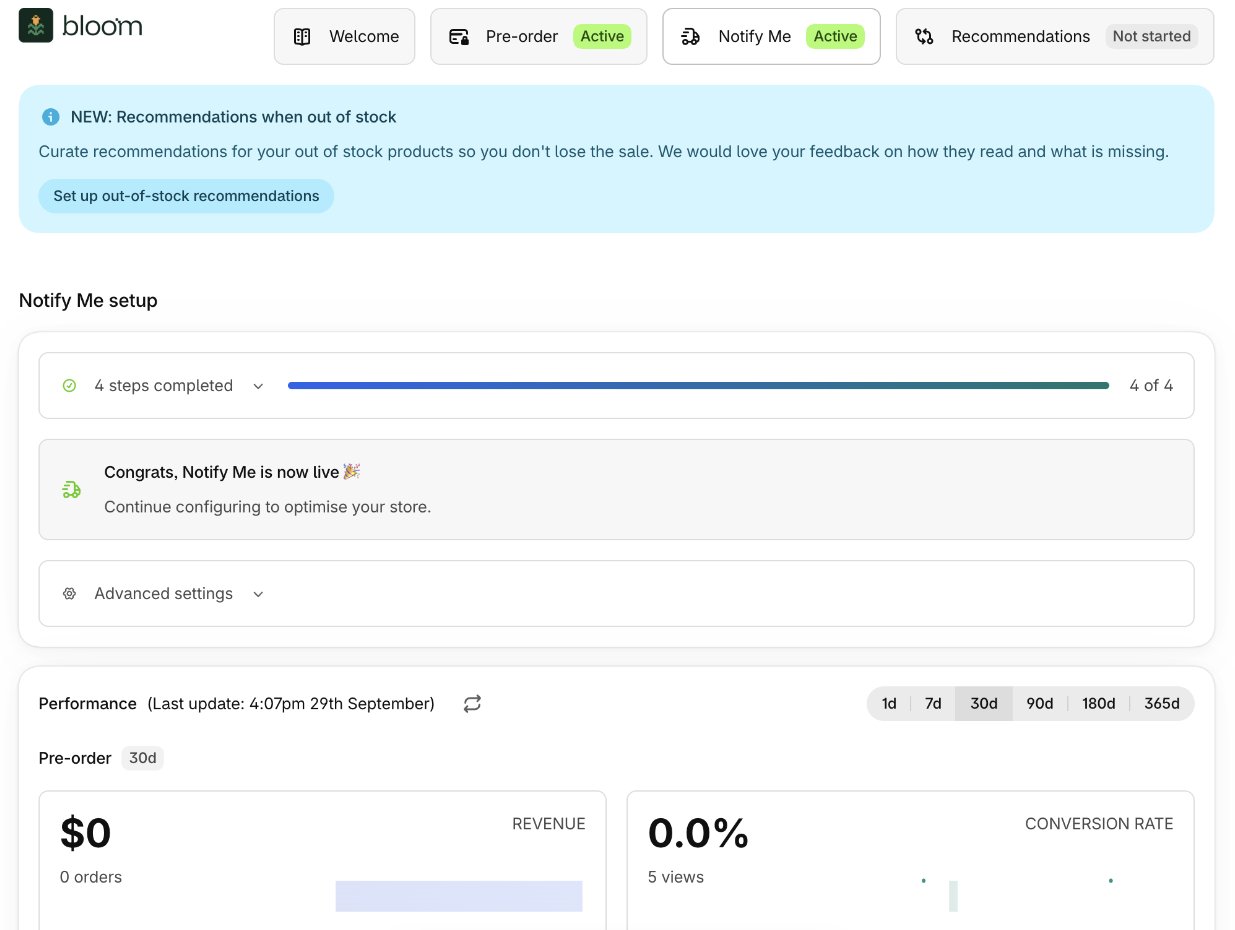
Bloom’s Home page (Apps → Bloom) is the easiest way to work through setup. The sidebar holds Pre-order, Notify me, Recommendations and Settings.- Tiles across the top pick a setup guide - Welcome, Pre-order, Notify Me and Recommendations. Each feature tile shows Not started, Setup in progress or Active.
- Pick a tile to see its setup steps. Each step has a button that deep-links to the right screen - Theme editor, Edit design, Manage products, Configure Klaviyo and so on. Most steps tick themselves off once Bloom detects them.
- Performance runs underneath, showing revenue, conversion and sign-up stats once orders and sign-ups start landing. See Results.
- One banner shows at a time, most urgent first - setup problems such as the theme embed being off, approaching your plan limit, reinstall choices, then Recommendations.
- When stock arrives for pre-orders, a Ready to ship card appears with a Review & release button. See Releasing pre-orders.
1. Enable Bloom in your theme
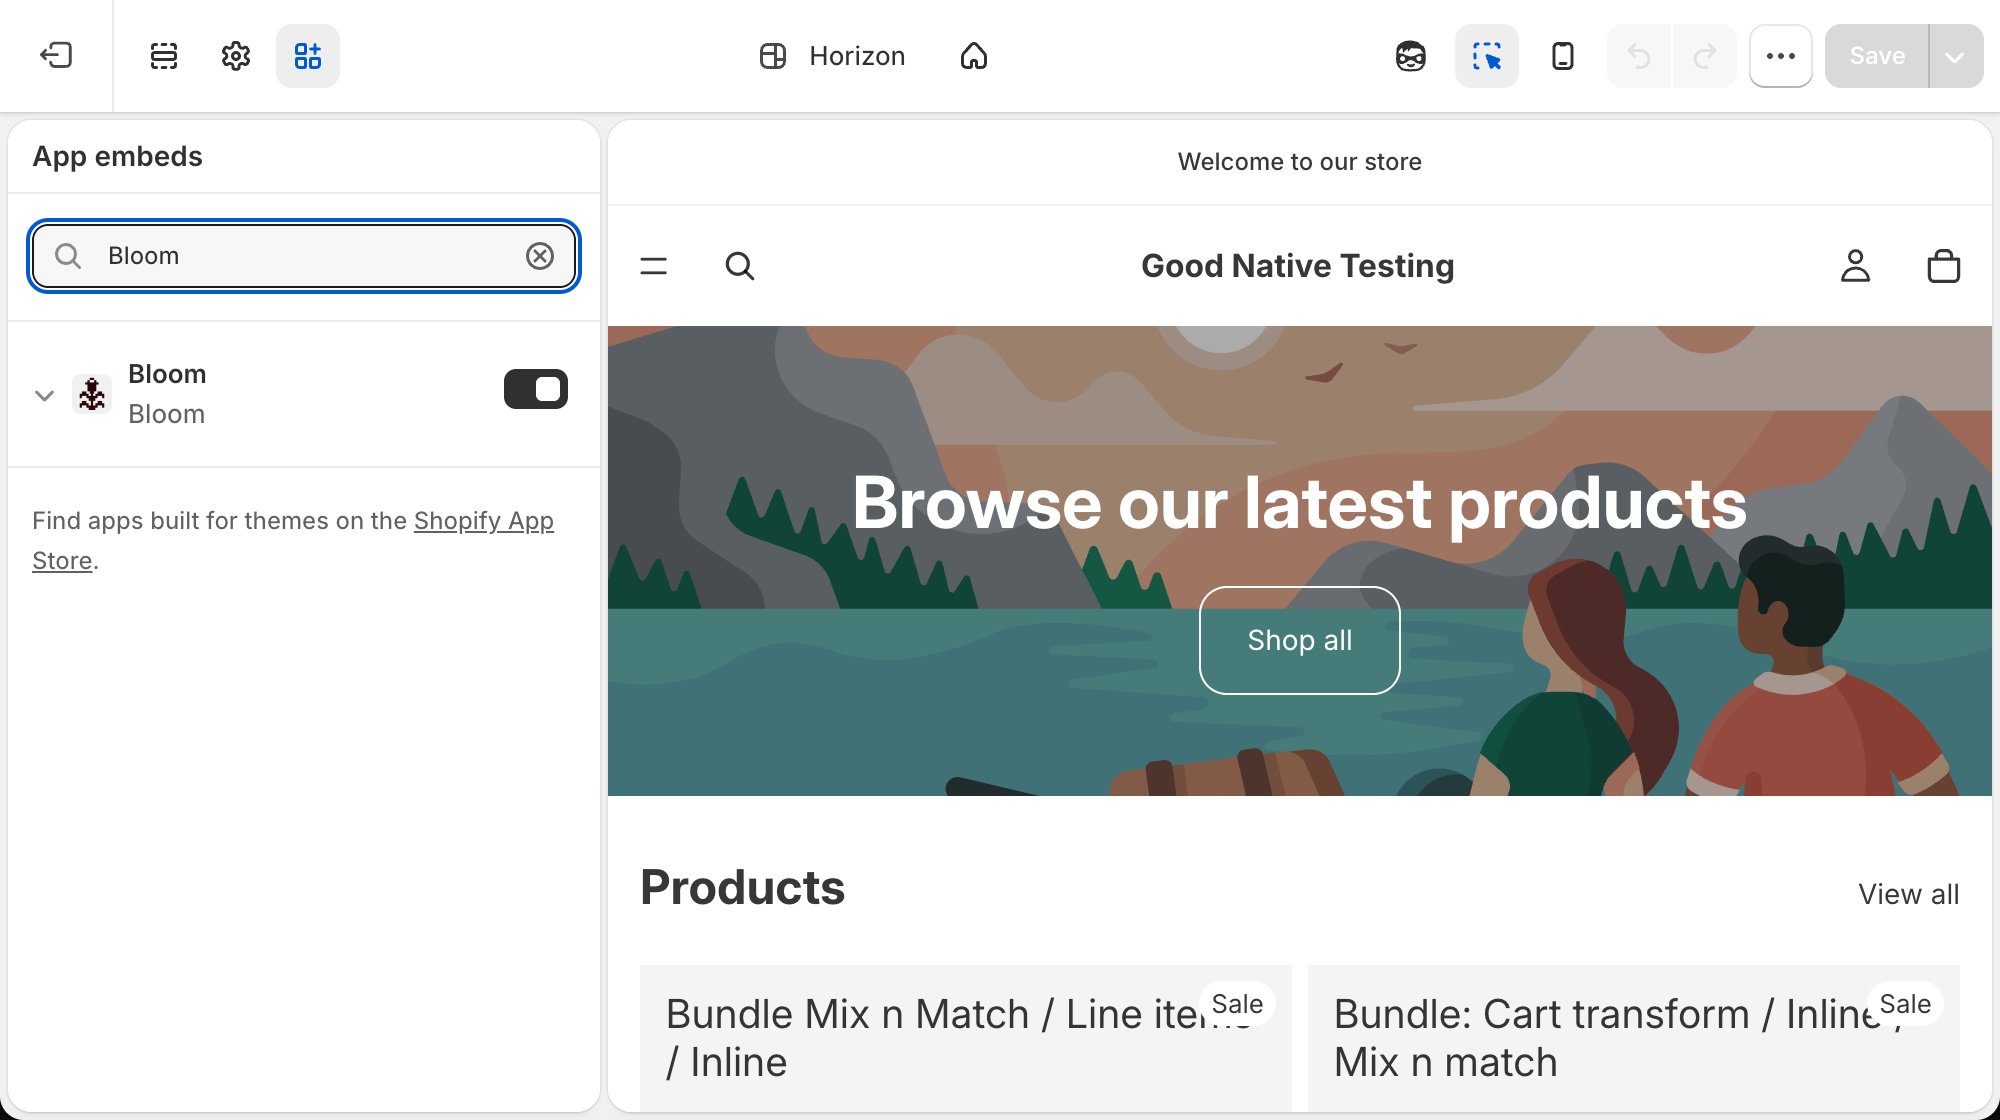
Enabling the Bloom app embed is the only theme change required. The pre-order message and Notify Me form auto-inject next to your Add to cart button on every product page.- From Shopify admin, go to Online Store → Themes.
- On your live theme click Customise.
- Open the App embeds panel (the puzzle-piece icon in the left sidebar).
- Toggle Bloom on.
- Click Save.
We recommend disabling instant checkout (Shop Pay, Google Pay, and other dynamic checkout buttons on the product page) for pre-order products. Instant checkout skips the cart, so shoppers miss the pre-order line item message and cart messaging that explains what they’re agreeing to.
Product page block
Most themes need nothing more than the app embed. Add the Bloom Product block to your product template only if:- The pre-order button flickers or doesn’t appear on your theme.
- You want per-template, market or locale overrides.
2. Design & messaging
Style buttons and messaging on PDP and cart to match your brand.- In Shopify admin, open Apps → Bloom.
- Open Pre-order or Notify me in the sidebar, then the Design tab.
- Work through the sections in the left column, adjusting text, buttons, colours, borders and spacing.
- Check your work in the Preview panel. Switch between Product page and Cart, and between states such as Pre-Order, Pre-Order Notify and Sold-Out Notify.
- Click Save.
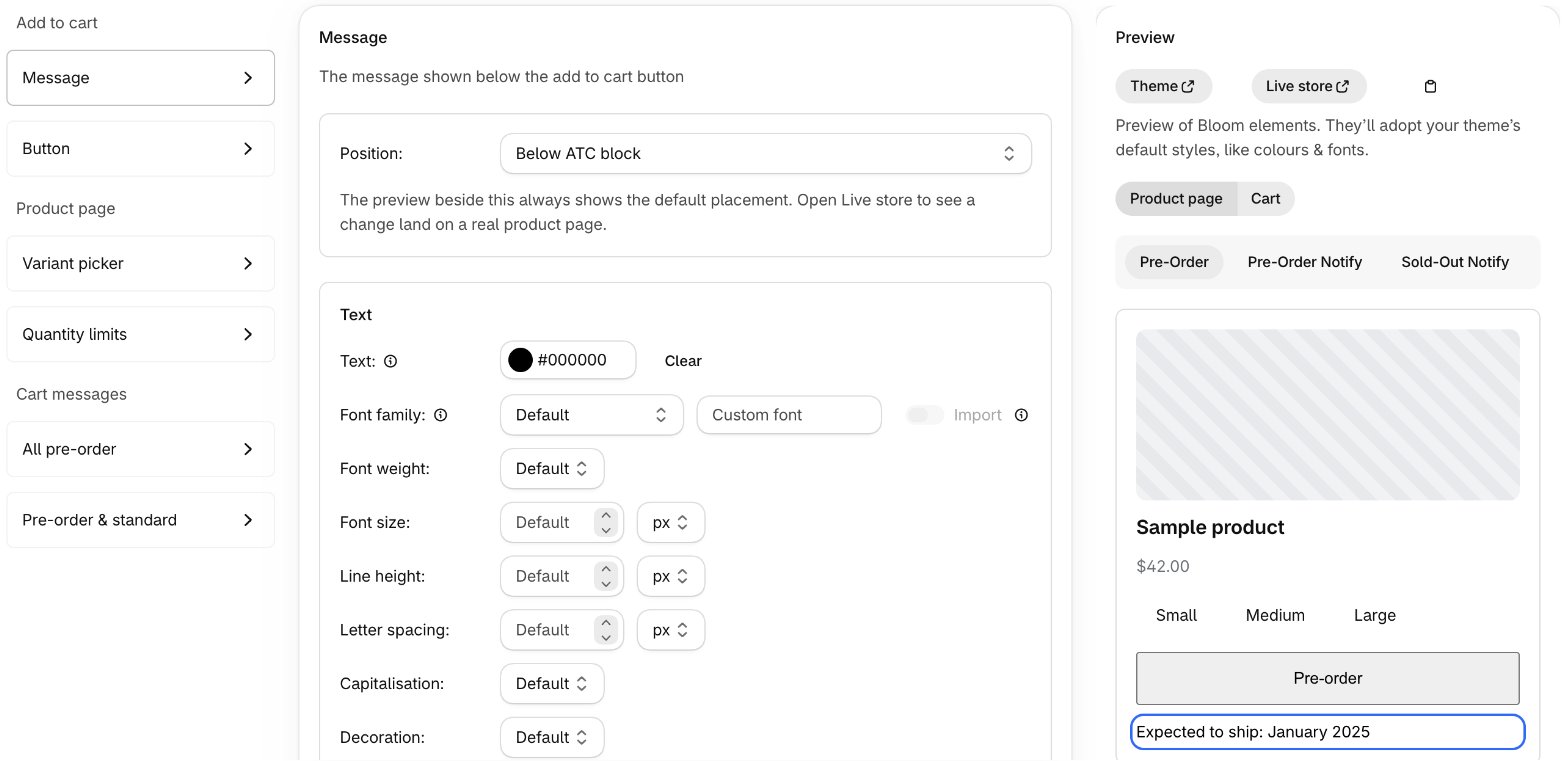
Pre-order and Notify Me appear below the Add to cart button and at the bottom of the cart; Notify Me is a form by default. Move the pre-order message with Position at the top of the Message group on the Design tab. Cart placement stays in Pre-order settings, and the Notify Me layout is in Notify Me settings.
Edit on your live store
The Preview panel always shows the default placement. To see changes on a real product page:- On the Design tab, click Live store in the Preview panel.
- Change styling, copy and placement on your storefront, with desktop and mobile previews.
- Changes autosave as a draft. Publish the ones you want and leave the rest for later.
- In Shopify admin, open Apps → Bloom.
- Open Pre-order or Notify me, then the Content tab.
- Adjust default messaging for each placement. The preview updates as you type.
- Click Save.
You can tailor messaging on specific templates, locales or markets by using the Bloom blocks in your theme customiser. See Tailor template, market or locale.
3. Configure products
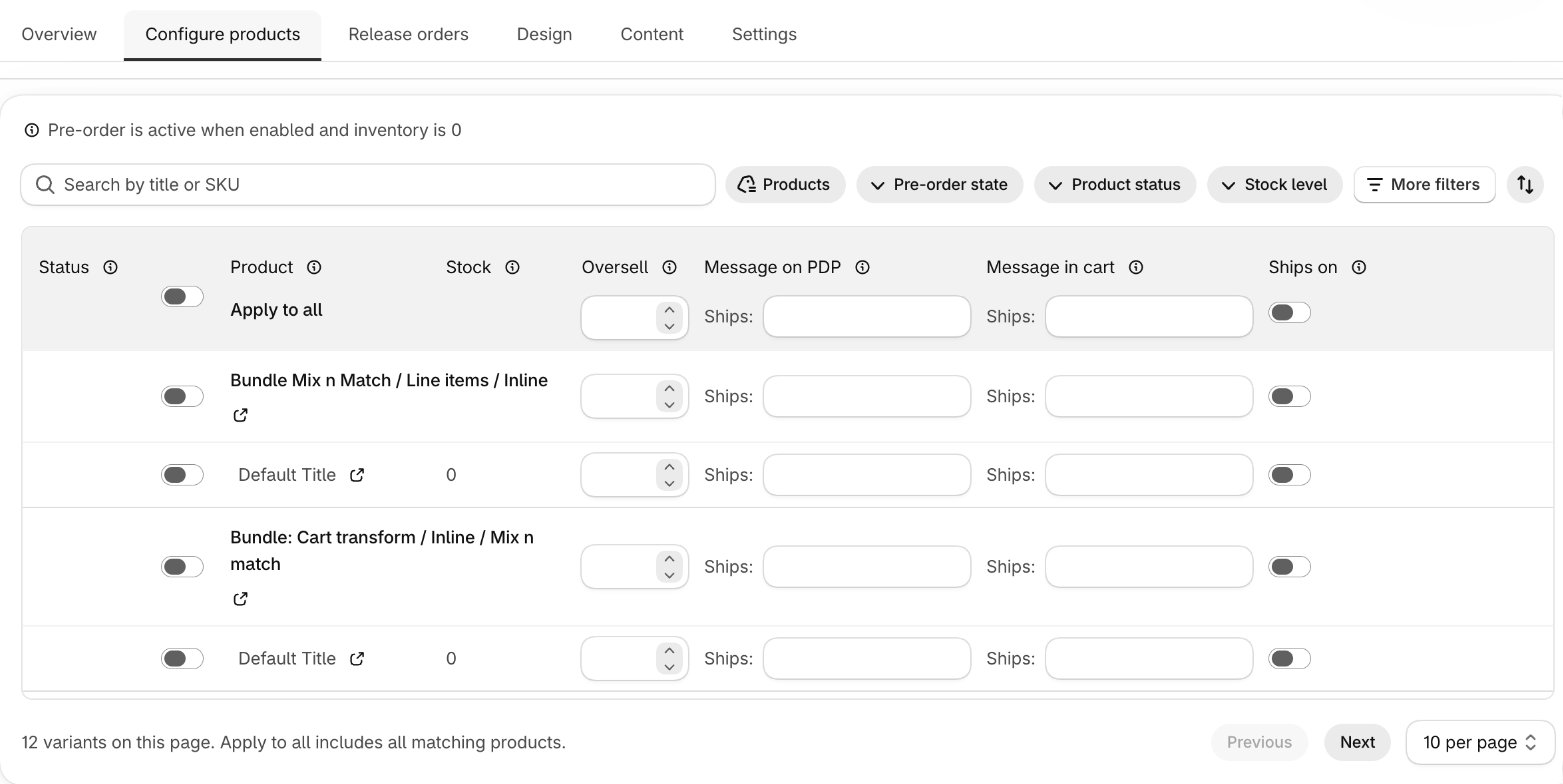
You can bulk update pre-order and Notify Me settings for products and variants with a high level of granular control.- Pre-order Shows when a variant has pre-order enabled, has an oversell limit, and is out of stock.
- Notify Me Shows on any out-of-stock variant, unless disabled.
- In Shopify admin, open Apps → Bloom.
- Open Pre-order or Notify me, then the Configure products tab.
- Find the variants you want with the search and filter bar. Search by title or SKU, or filter by Product status, Stock level, Vendor, Tag, Product type or Collection. Set Stock level to Sold out for everything currently at zero.
- Edit the Apply to all row to set every matching variant at once, or edit a single product or variant row.
- Set oversell limits, messaging, ship dates, and when pre-order should start.
- Click Save.
The Release orders tab alongside Configure products is where you release pre-orders once stock lands. See Releasing pre-orders.
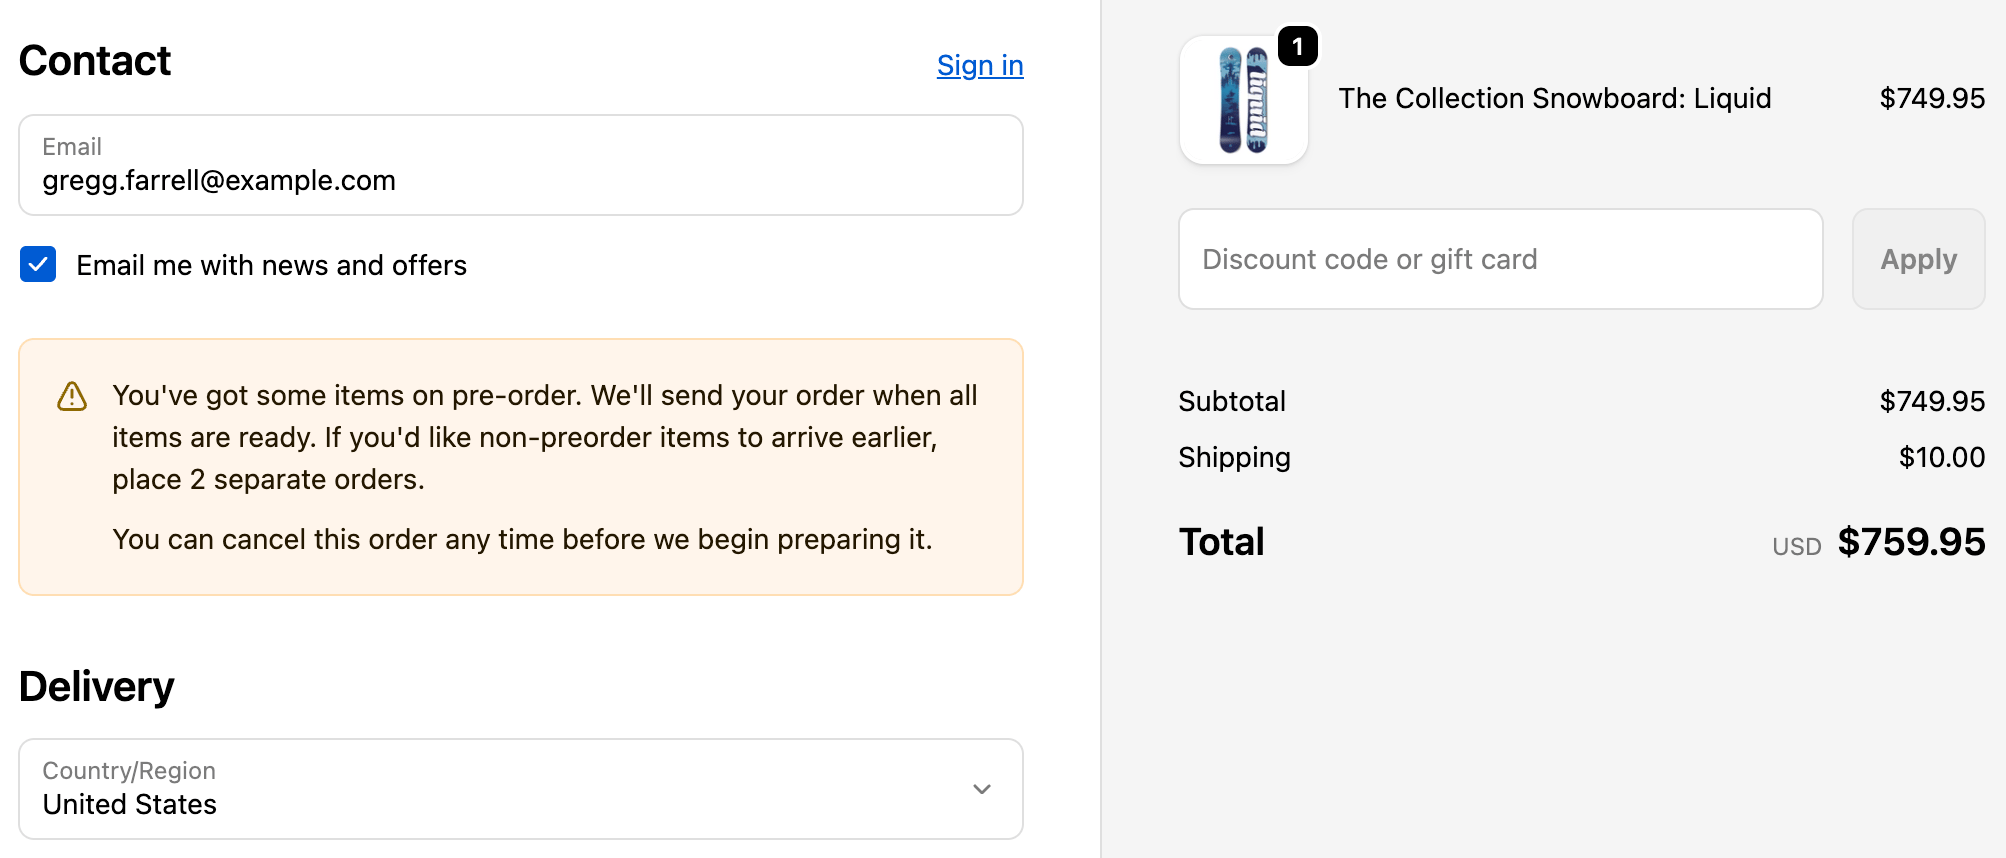
The Message in cart you set on each variant also shows on the checkout page (Shopify Plus), the Thank you page, and the customer’s order status page - see the next section.
4. Pre-order Show pre-order info during and after checkout
Bloom ships three customer-facing blocks beyond the product page:
Where the copy comes from:
- Banner text on Checkout and Thank you: Apps → Bloom → Pre-order → Content → Cart messages → Cart notices.
- Per-line text on Order status: each variant’s Message in cart.
Add blocks to checkout, thankyou & order status
- Open the relevant editor in Shopify admin (the setup guide’s Checkout, Thank you and Order status buttons link straight there):
- Checkout and Thank you: Settings → Checkout → Customize (Shopify Plus).
- Order status: Settings → Customer accounts → Customize.
- Switch to the page, click Add app block, pick the Bloom block.
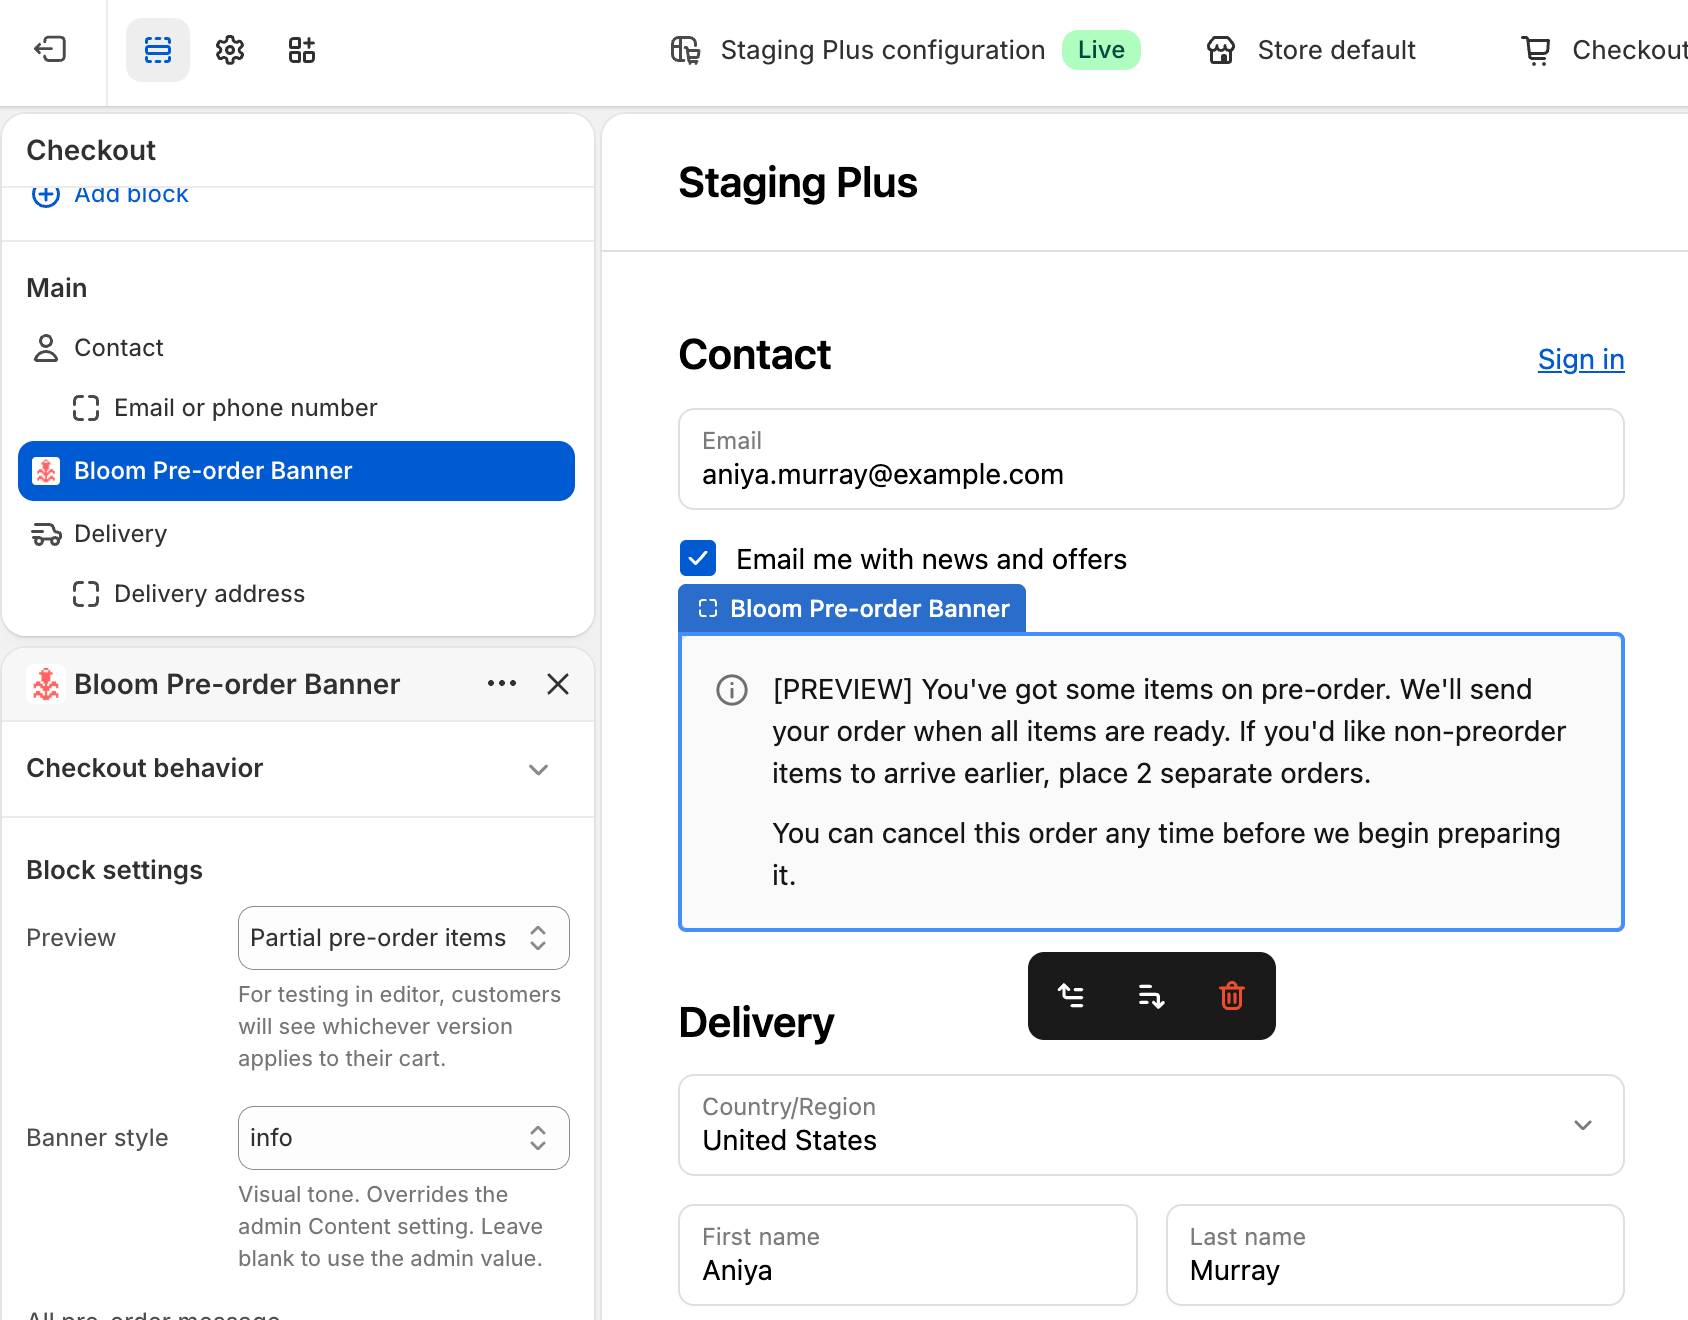
- Click Save.
5. Notify Me Connect Klaviyo
All email and SMS communications come from Klaviyo using their back-in-stock flows. To start capturing back-in-stock sign-ups, configure Notify Me settings. To start sending notifications, follow the back-in-stock flow guide.Connect Klaviyo
Link your Klaviyo account in one click. The Klaviyo List you use can be a dedicated back-in-stock list, or your standard newsletter list.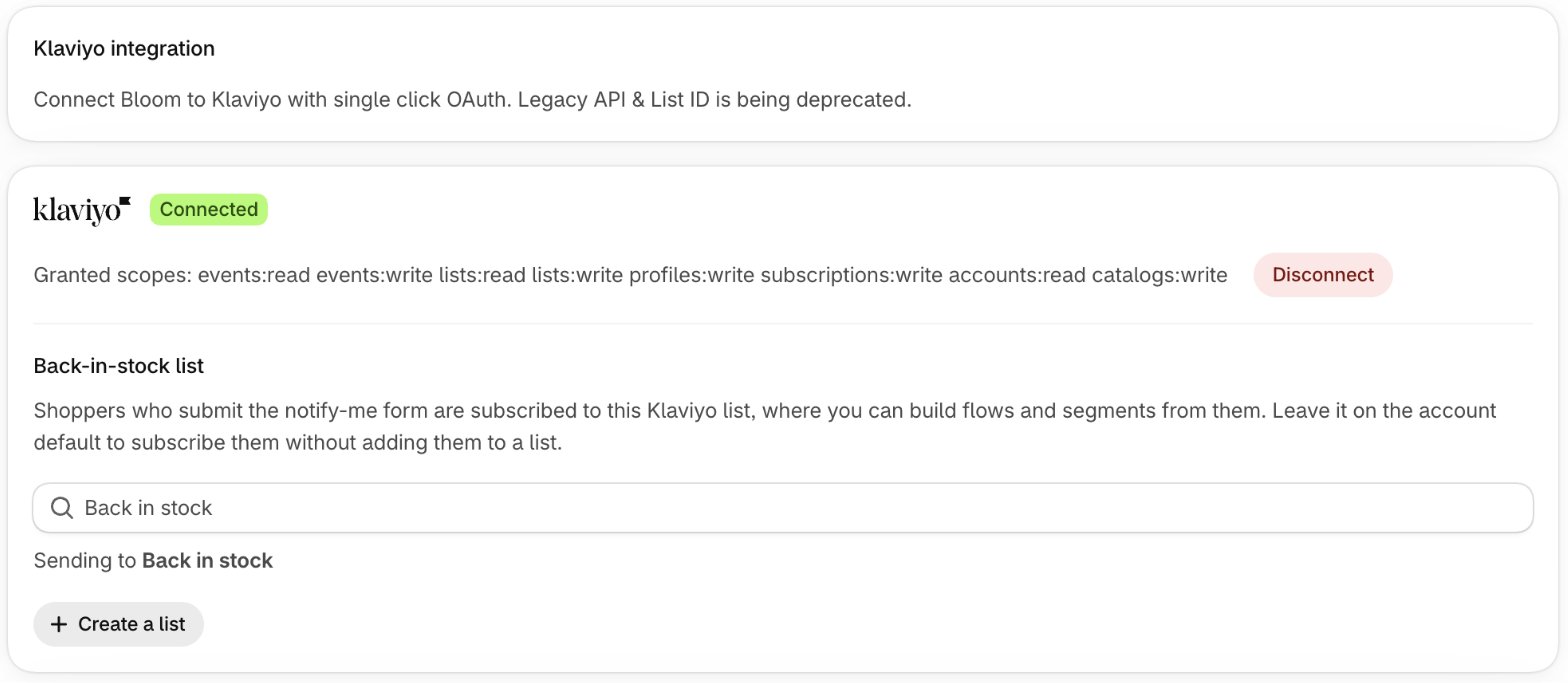
- In Shopify admin, open Apps → Bloom.
- Open Notify me, then the Settings tab, then Integrations → Klaviyo integration.
- Click Connect Klaviyo and authorise Bloom. The panel shows Connected with the granted scopes.
- Pick your Back-in-stock list, or use Create a list to make one. Leave it on the account default to subscribe shoppers without adding them to a list.
- Click Save.
You will start receiving notify me sign-ups at this point.
Set up the back-in-stock flow in Klaviyo
Notify Me sign-ups are captured immediately, but no email or SMS goes out until this flow is live in Klaviyo.Full walk-through: Set up the back-in-stock flow.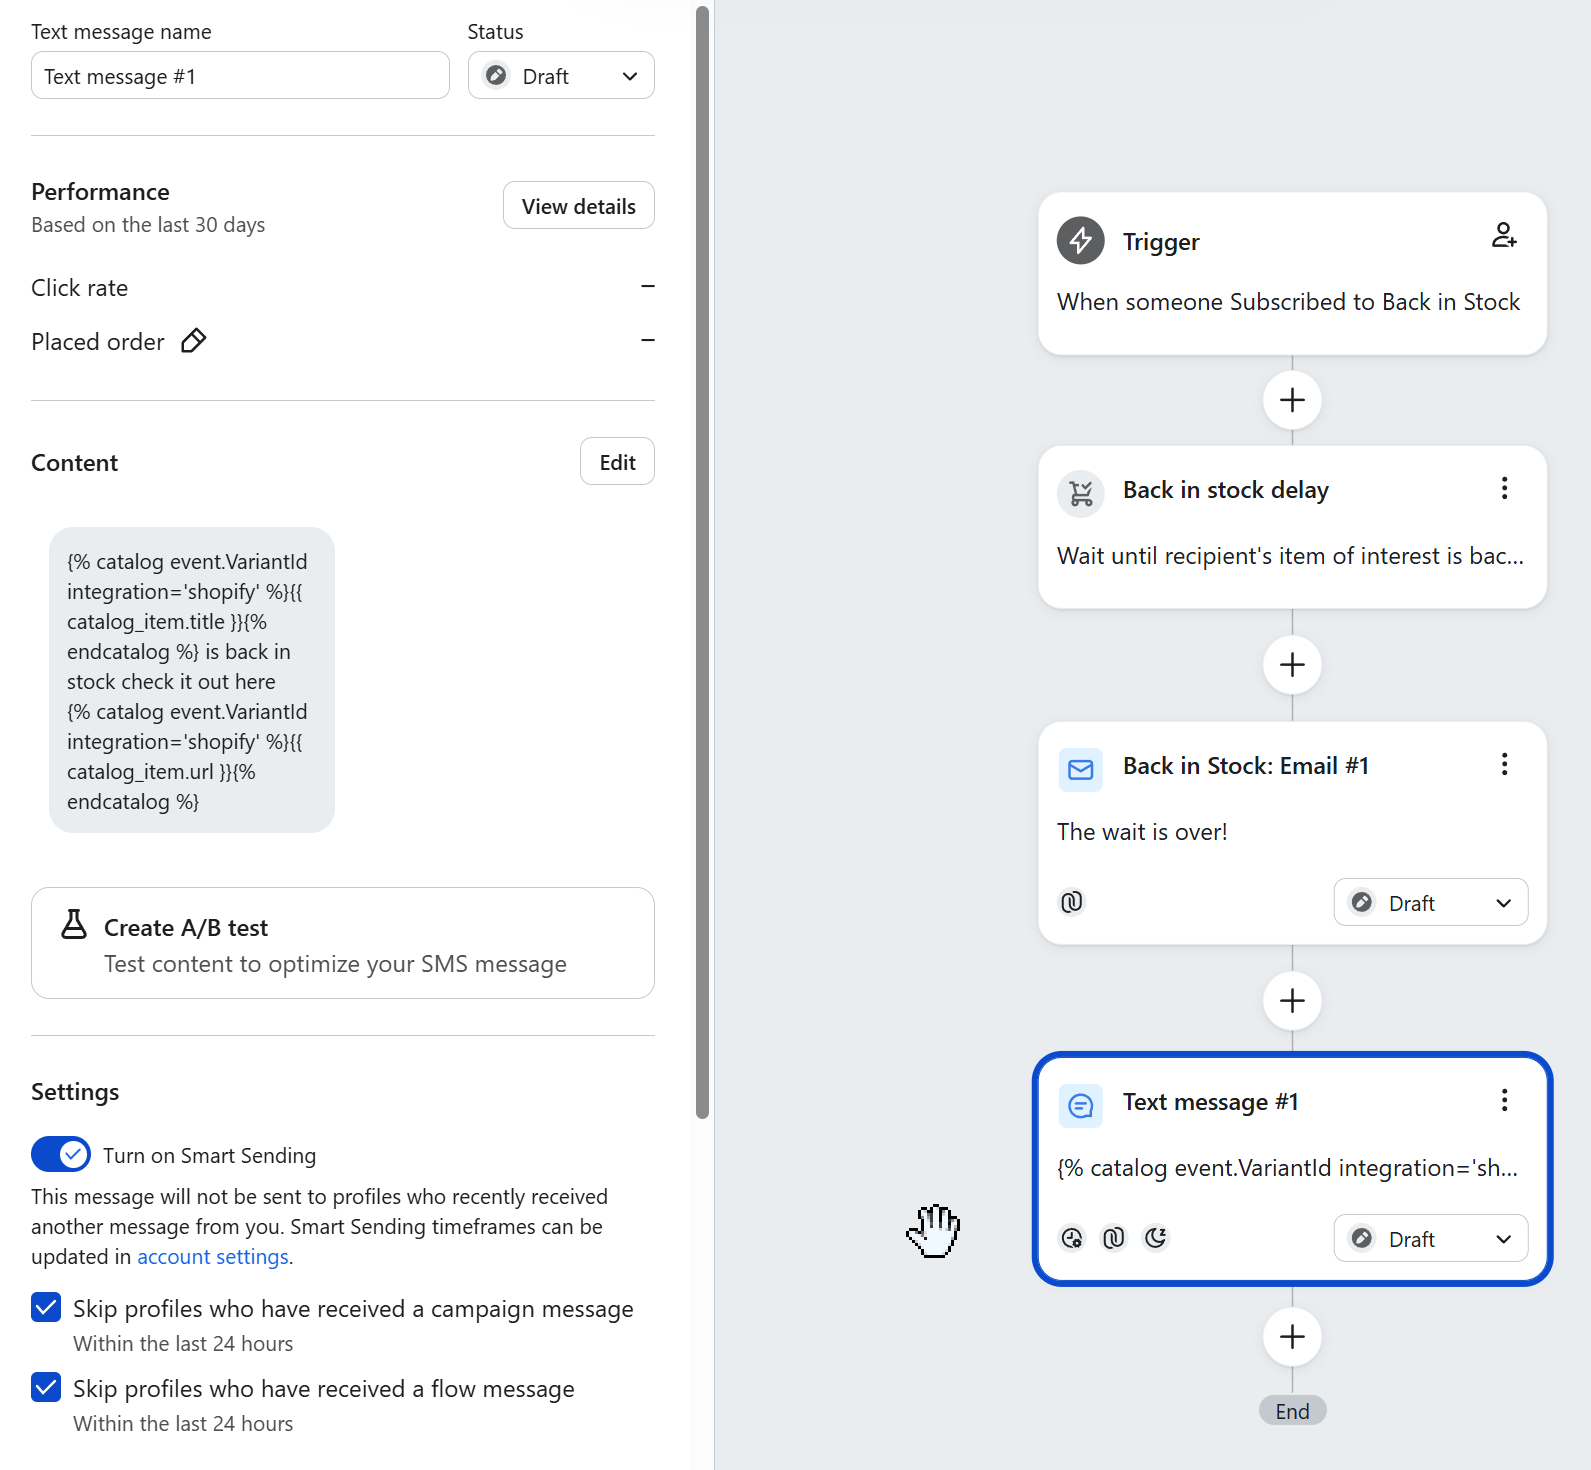
Bloom does not display on gift card products.