
The functionality has been heavily tested with top 20 theme developers and most used themes. If you need support contact us and we can optimise the app to work on your theme.
Most themes work without any developer configuration. Try a normal install first; only come here if the widget isn’t anchoring correctly.
ATC button selector
Find it at Apps → Bloom → Settings → Advanced → Add to Cart button. Paste a CSS selector that uniquely identifies your theme’s buy button. Bloom tries this first; if it doesn’t match, auto-detection still runs as a fallback.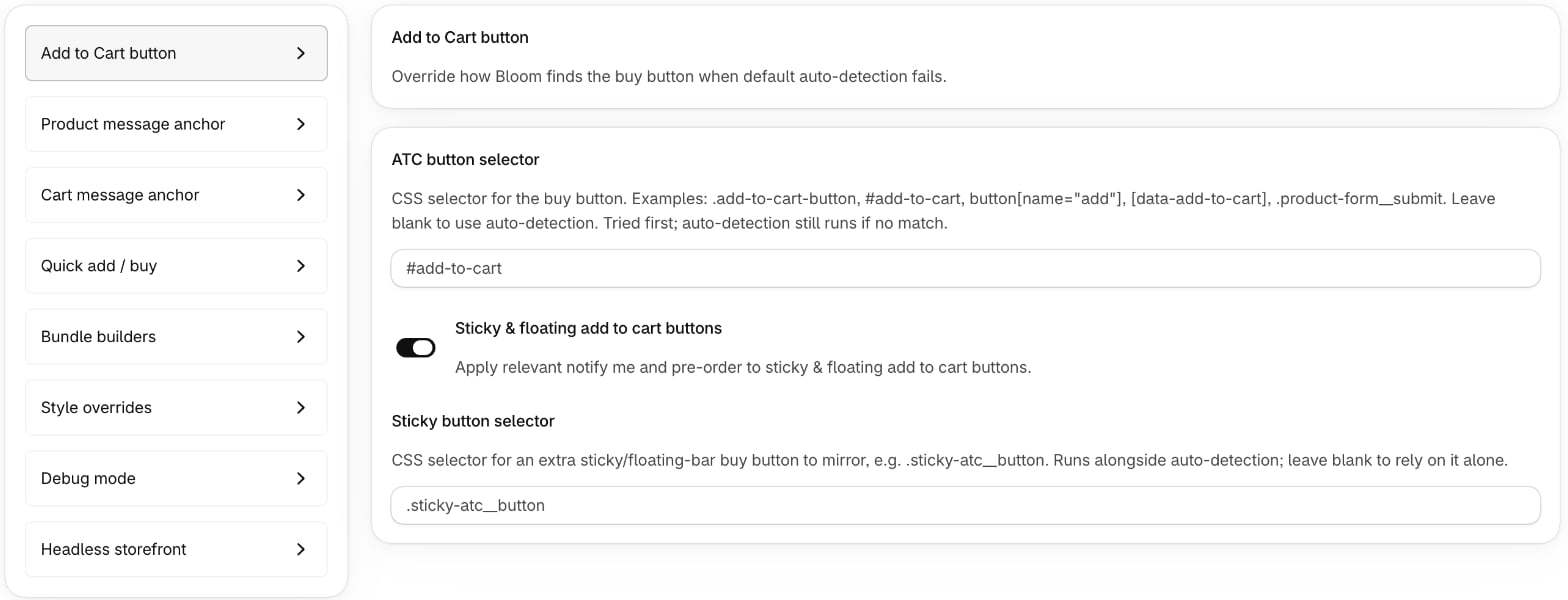
Examples
How to find your theme’s selector
- On your storefront product page, right-click the Add to cart button → Inspect.
- In the highlighted DOM node, look for an
id,name,data-*attribute, or a stable class. - Use the most specific stable identifier:
idis best:#add-to-cart- Next:
name/data-*attribute:button[name="add"],[data-add-to-cart] - Last resort: class names - themes change these between updates.
- Paste into the ATC button selector field. Click Save.
- Reload the product page on the storefront and confirm the widget appears below the button.
Sticky, floating and quick-buy buttons
Bloom handles these alongside your main buy button, on by default. Their label and state - pre-order, sold out, in stock - mirror Add to cart. Controls sit in the same Add to Cart button panel:- Sticky & floating add to cart buttons - turn Bloom’s handling off for the whole store.
- Sticky button selector - point Bloom at an extra sticky or floating-bar buy button to mirror. Runs alongside auto-detection; leave blank to rely on it alone.
Whether Notify me shows on each of these buttons is set under Notify me → Settings → Display - see Notify Me settings.