
Steps
- In Shopify admin, open Apps → Bloom.
- Go to Notify me → Settings, then Integrations → Klaviyo integration.
- Click Connect Klaviyo.
- Authorise Bloom in the Klaviyo window that opens.
- Pick your Back-in-stock list. Most stores use a dedicated list like Back in stock. Create a list makes one without leaving Bloom, and leaving it on Klaviyo account default subscribes shoppers without adding them to a list.
- Click Save.
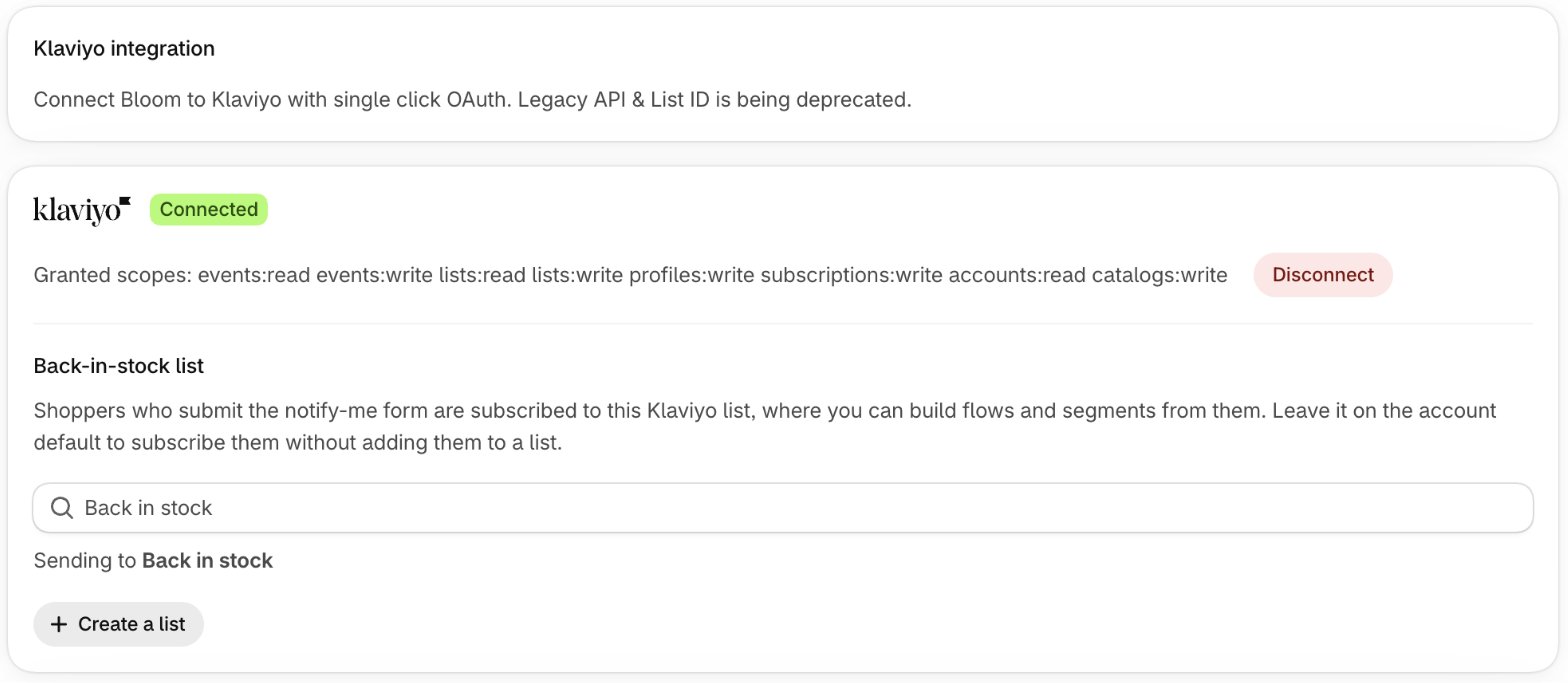
Connections made before this access was added keep working, but show Reconnect Klaviyo on Home, in Notify me → Settings and on Notify me → Overview until you reconnect and approve it.
Notify Me Campaigns need the one-click connection. They don’t show on stores using the legacy fields below.
Connect from a link
GoodNative support may send you a link that skips steps 1-3. Install Bloom first, then open the link while logged in to Shopify admin. It goes straight to Klaviyo’s consent screen:https://admin.shopify.com/store/<store>/apps/bloom-good-native/app/notifyMe/settings?tab=klaviyo.api&klaviyo=connect
<store> is your store’s handle, as it appears in your Shopify admin URL. If Klaviyo is already connected, the link just opens the Klaviyo settings.
After Klaviyo you land back on the same settings panel. A successful connection shows a Klaviyo connected toast. Choosing not to allow access shows Klaviyo permissions declined, and any other failure shows Klaviyo couldn’t be connected. Try again. Both have a retry button. Then pick your list as in steps 5-6.
Next: set up the flow
Connecting Klaviyo means sign-ups will land in your list - but Klaviyo won’t send anything until you configure the back-in-stock flow. See Set up the back-in-stock flow.Legacy connection
Before one-click connect, stores pasted two values from Klaviyo by hand. The fields are still there, further down the same Klaviyo integration panel. Bloom only uses them when Klaviyo is not connected above.- Company ID (Public API Key) [Legacy] - your Klaviyo site’s Public API Key (a short identifier, e.g.
AbCd12). Bloom uses it from the storefront to submit sign-ups. No private API key is required. - List ID [Legacy] - the Klaviyo list new sign-ups are added to. Required on legacy connections - Notify Me doesn’t load without it.
Find your Company ID
- Open your Klaviyo account.
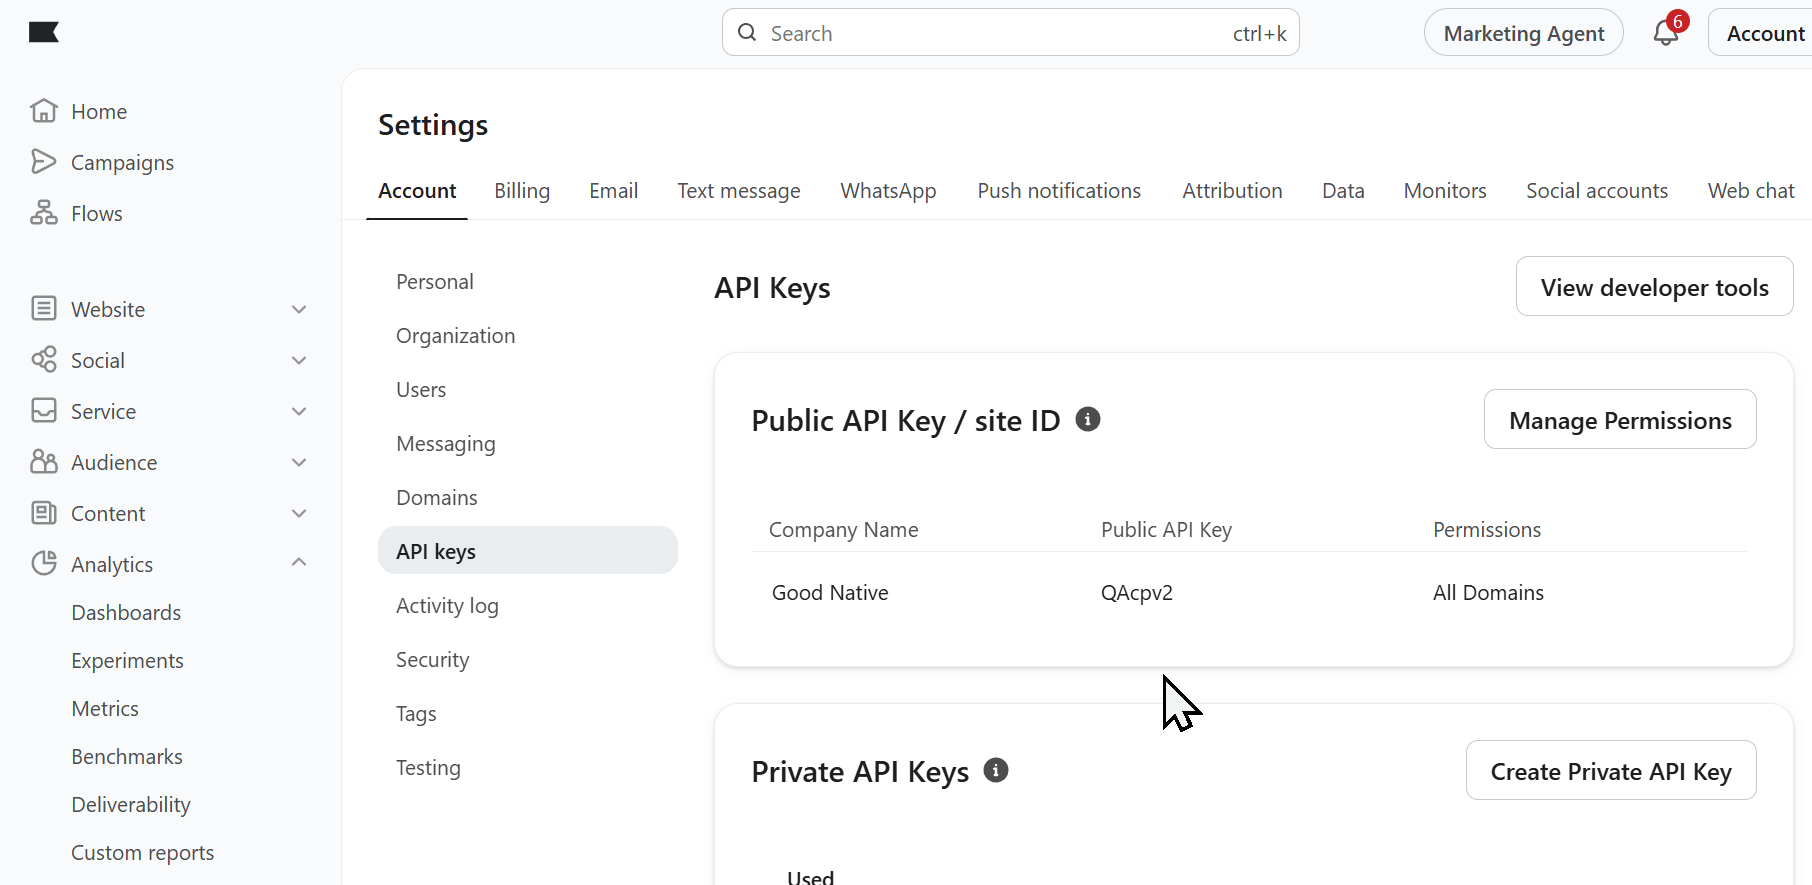
- Go to Settings → Account → API Keys.
- Copy the Public API Key - typically 6 characters.
QAcpv2in the example below.
Find your List ID
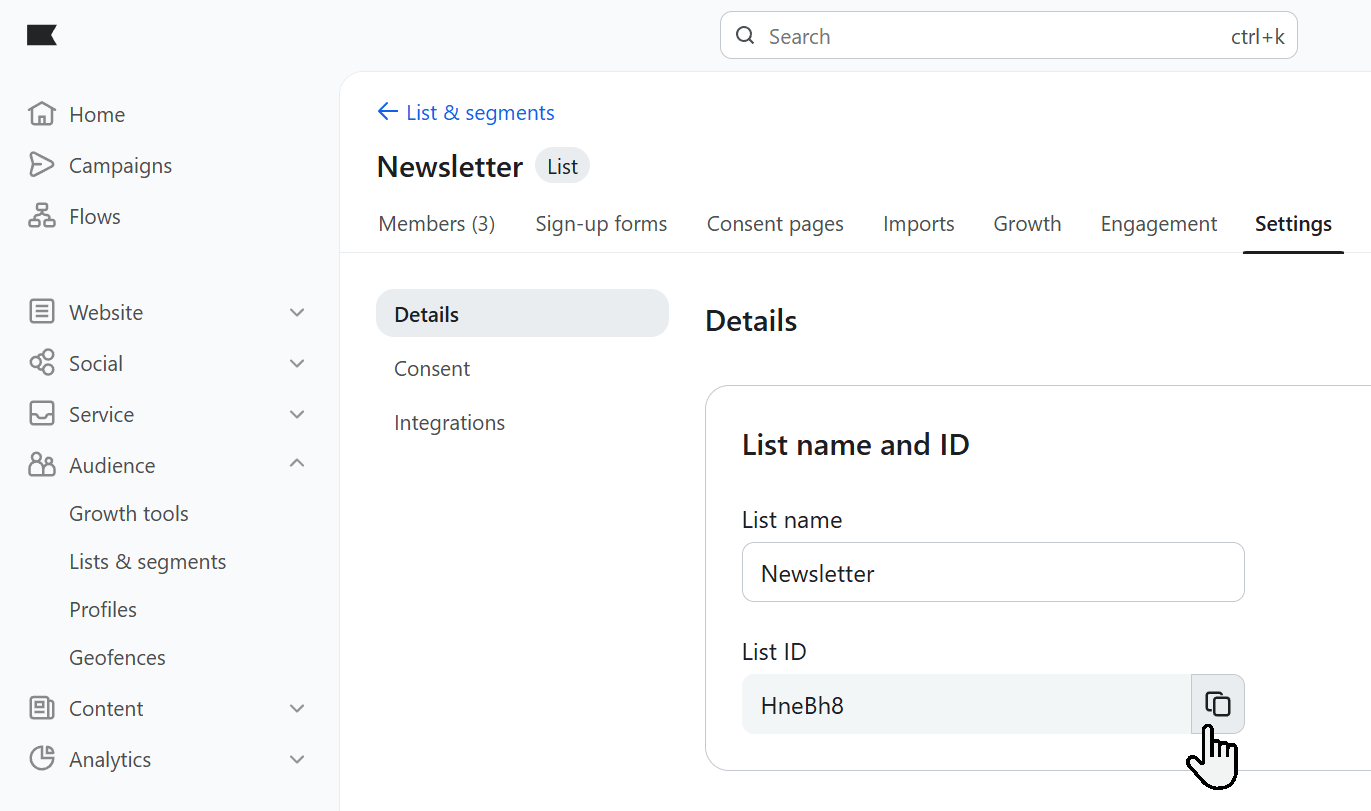
- In Klaviyo, go to Audience → Lists & Segments.
- Open (or create) the list you want Notify Me sign-ups added to.
- Click Settings on the list - the List ID is shown there (a 6-character code).
Paste both into Bloom
- In Shopify admin, open Apps → Bloom.
- Go to Notify me → Settings, then Integrations → Klaviyo integration.
- Paste your key into Company ID (Public API Key) [Legacy].
- Paste your list ID into List ID [Legacy].
- Click Save.